Mies van der Rohe Daybed


This scene is built around the iconic Mies van der Rohe daybed. It is such a fantastic piece. As photographed, the scene looked "sleepy" to me, kind of dreamy. I played with the lighting a bit to try to evoke different moods. I also used the plant in the foreground in some cases, and in others, not. I couldn't decide if it worked or not.

Photographing this scene reminded me of the many hours spent wallpapering this space. I think the paper has held up so well, which makes me not regret all that measuring, cutting, and gluing!

I don't recall where or when I got the bee artwork. It is a heavy plastic -- perhaps it was part of a belt or some jewelry. The other shield-like piece is also a random find -- not sure where I got it or how it was originally used.


I'd love to get one of these daybeds for real one day -- a 1:1 scale version!! One can dream...

Credits: Daybed by Reac; rug by IKEA; shelving unit by Patie of minisx2 on Etsy; topiary plant is
AG Minis; long plant is TOMY; stools are Paris Renfroe.; arc lamp is an eBay find. Accessories are Dragondee, Oese, and doll show finds.

The time it took me: 45 minutes

Citadel Terrace

Minor victory: I added the terrace to my Citadel house, which has been a long time coming! The Citadel was one of the first houses I purchased, and somewhat impulsively. Back in 2009, it came up on eBay as a Buy it Now, pickup only in Chicago, IL. I live in NJ, but rationalized that I had family there, so why not?

As it turns out, our family did not have to do anything, since we took a road trip with our three kids and went to pick it up! You can read about our adventure here.

Since then, the Citadel has brought me great joy. It's been the setting for both of my book cover projects, and the editorial work I did for Ladies' Home Journal. I've spent lots of hours wallpapering and restoring one side of the house; I still have the other side to tackle, as well as the central stairwell, which is supposed to be enclosed in plexi.

I love this house. Period! I was wanting to give it a little love, so I decided to glue back the terrace to where it belongs. It broke off during the car ride home back in 2009, and has been sitting around for almost 7 years!!! And it was pretty painless to do too...

I hope you enjoy the result!


Credits: Chairs are CB2 ornaments; pillows are minimodernistas; topiary is AG Minis; other plant is TOMY; table is vintage Petite Princess; glasses are vintage German. In the living area, the couch and rug are minimodernistas; table and shelving unit are by Patie of MinisX2 on Etsy. Accessories are AG Minis, Re-ment, miniatures.com, Michaels, eBay finds, and dollhouse show purchases.

Horrorstör Book Cover

As I hinted in this post, I have been working on a unique and exciting book cover project since the winter. I can finally share it and am thrilled with the results!

Introducing....Horrorstör by Grady Hendrix!

Published by Quirk Books and due out in September 2014, Horrorstör is a murder mystery set in ORSK, an IKEA-like store. I styled and photographed the front and back covers and it was an exciting journey to bring the project to completion. I learned a lot along the way, and am proud of the outcome.

The author, Grady Hendrix, is a writer and former film critic who is one of the founders of the Asian Film Festival. He has written fiction and non-fiction, and Horrorstör is a sharp, spooky ghost tale with a sense of humor.

Intrigued? It gets better.

The book is sized and packaged like a retail catalog, including illustrations of ready-to-assemble furnishings. (I cannot reveal the interior at this point, but the publisher will soon.) The catalog approach was the key inspiration for the cover design, and of course was driven by the story line. I worked with Andie Reid, one of Quirk's very talented designers, and she provided the overall creative direction: the front cover should be a closeup of a showroom-type interior, be well-lit and modern, and employ a blue and yellow accents; the back would be a creepy interior counterpart.

As with my last cover, Dear Girls Above Me by Charlie McDowell, the cover came together after a series of months collaborating with the publisher. While the vision was clear from the beginning, Andie and I both contributed new ideas along the way to produce the best possible results. I tried new techniques and tools with this job -- I bought an external flash and macro lens, which greatly improved the quality of the photographs, and I also utilized Olioboard to help visualize the space and exchange ideas with Andie.

After choosing my trusty Citadel dollhouse as the location, a big part of my job at the beginning was sourcing all the furnishings for the project, which took a number of weeks. The starting concept included a dining scene for the back cover, inspired by actual IKEA products. We gravitated toward these furnishings:

Foto Pendant Lamp

I worked with Patie of Minisx2 on Etsy, and she was wonderful in producing such close matches! We initially incorporated some spooky elements like knives and tipped over chairs:

Unfortunately, none of these pieces were used, since it was decided to do a version of the living room scene on the back instead.

The living room scene was really fun to put together, and the unique shelving unit by Patie nicely tied it all together. It's a great modular piece and so well made. Patie also made the boomerang tables. The Tootsie Roll sofa by minimodernistas was already in my collection and it ended up being a great fit. I chose a few different minimodernistas pillows and the arrow one worked best...it was my way of pointing to the spooky back cover. :)

The frames are from Paris Renfroe, who also provided an arm chair and gorgeous black console, but they got edited out in the process. The plant is AG Minis and the rug is IKEA (of course!). The flooring is Contact paper and worked quite well. I used bright white craft paper for the walls, held up with binder clips. Here is a picture of the work space, which also shows a Lundby hanging fixture, also not used:

For the back cover, I shot the same living room scene, but stripped it of many of the accessories. Andie then did her magic with PhotoShop and transformed it into a mirror image of the front. It's an utterly dark and murky scene, with all new details by Andie on the floor, walls, and inside Patie's shelving unit. So clever!

I hope you enjoyed this cover reveal and I am happy to be finally in a position to share the news. The book is available for pre-order now on Amazon and Barnes & Noble, and is also available on KindleNook, and eBooks. Also, the Book Smugglers site  is doing a giveaway -- go enter now!

Macro


The book cover project has been keeping me very busy these past few weeks, so I have not had much time to play around with my collection. It shouldn't surprise you that I have created a monumental mess as a result of this new endeavor since it entails lots of setups and accessories; I have definitely fallen behind in my mini house-keeping. There's furniture all over the place, tiny cups and saucers, books, shoes, rugs, you name it. To be fair, the mess was out of hand before I started the book cover, but now it has reached crisis proportions!

The chaos gives birth to some progress, though. I bought a new macro lens and flash for my Nikon camera and have been enjoying them.


The flooring is made of pieces broken off a placemat!


Do you ever switch up your equipment to produce different effects? I'd love to hear about your experiences.

Credits: Desk is by Patrizia Santi; chair is by Patie of minisx2; light is vintage Lundby; shelving unit is PRD Miniatures; round chair is CB2, spray painted black. Accessories are Re-ment, L.Delaney Miniatures, Ray Storey, Dragondee, Michaels, vintage eBay and dollhouse show finds.

The time it took me: 57 minutes

UP


"UP." I like when a little word carries so much meaning. There is a visual clue for the word embedded in this scene -- easy to find, I think!

Speaking of up, I flew back from Amsterdam last week, where I was on a work-related trip. I have never been there, and it is a beautiful, magical city. While I only had very little free time, I tried to "feel" the place as much as I could: bicycles whizzing by, cobblestone streets, mirror-like canals, bridges, dimly lit streets at night. The canals were especially picturesque.


In the free time I did have, I visited the newly-renovated and reopened Rijksmuseum and the van Gogh Museum, where my head spun 'round from seeing all the masterpieces that I had seen in books growing up, such as van Gogh's Sunflowers.


And...the Rijksmuseum has a room devoted to antique cabinet dollhouses. Stunning!!!


With all my running around, I never managed to have a photo taken of myself in the city...only a selfie in my hotel room, before heading out for another work function!


I met some lovely people, one of whom thoughtfully gifted me with the modern brown side chair and paint set in this scene. Thank you, C.!


I already had the sunflowers, nicely nestled in a vase by Ray Storey...


Hope everything is looking up for all of you!

Credits: Bed is vintage German; side tables and wall sculpture by Pepper of MitchyMoo Miniatures; shelving unit and striped rug are IKEA; chairs are Reac; couch is an artisan piece by unknown maker; TV unit and coffee table by PRD Miniatures; clear table by Petite Princess; planters by TOMY; plant is AG Minis; lamp by minimodernistas; typographic letters are vintage. Accessories are Modern Mini Houses, Manor House Miniatures, Re-ment, L. Delaney, Ray Storey, AG Minis, The Shopping Sherpa, minimodernistas, and beads from Michaels.

The time it took me: 45 minutes

Adhesive Washi Paper


I would definitely file myself under "obsessed" when it comes to washi tape. I've used it many times over the years, in a bath scene, for swaps, in an office, and in many other cases. I collect it like crazy. So, of course I picked up a stack of the new adhesive 6 x 6" sheets when I saw them in the Paper Source this weekend. (I had seen 12 x 12" sheets at the NYIGF in January, so I have been waiting for them to show up in the stores.)


At $12.95 for 20 sheets, it's not cheap, but I'd say it is worth it to get all inspired by the patterns and possibilities. I also picked up some chevron burlap and a scene was born. In addition to covering the back of a couch and the dining table, I used some tape as a rug border. I easily gravitated to the red as a complement to the chevron burlap.


The paper is very easy to manage and cut, although a word of advice: do not pull it off the sheet too quickly, as it can curl and stick back onto itself. It comes off quite cleanly from objects, so you can remove it, as long as it is not adhered too long, i.e., months. Of course, please choose smooth surfaces, and no paper.

Here are a few more shots from my washi workout!


Credits: Dining table and red chairs are vintage German; dining chairs are eBay finds; shelving unit is a dollhouse show find; long planters are TOMY; standing plant is AG Minis; TV credenza is by Cyd of My Mini Mod Pod; coffee table is PRD; red balloon dog is from Toy Tokyo; chevron burlap is from the Paper Source; dining rug is textured paper from JoAnn Fabrics. Accessories are Manor House Miniatures, Barbie, Re-ment, Michael's, vintage German finds, Hallmark, The Shopping Sherpa, Lilu Shop on Etsy, Crate & Barrel, and minimodernistas.

The time it took me: 1 hour, 10 minutes


Dear Girls Above Me: My First Book Cover

It seems fitting to mark the start of my fifth (!) year of blogging with a little (big) announcement!

I am consistently amazed at the depth of this mini universe. It's been incredibly rewarding to meet and connect with hobbyists, design aficionados, artisans, and the generally curious since I started this blog in 2009. Some of these connections resulted in collaborations, such as the styling and photography spread I did for Ladies' Home Journal on real-life clutter, the exhibit featuring a fully-furnished Kaleidoscope house at my local Design Within Reach store, and interviews, articles, and other coverage in publications around the world. In each of these cases, there was a genuine fascination with the modern twist on miniatures, which made these events and interactions even more gratifying. Without a doubt, the article on modern miniature design in the New York Times in 2010 definitely helped to spark people's interest in this emerging side of the hobby.

Just over one year ago, I was contacted by Crown Publishing Group, part of Random House, to design a cover for a book by first-time author Charlie McDowell titled Dear Girls Above Me. McDowell, a comedian and filmmaker (and son of actors Malcolm McDowell and Mary Steenburgen) has an incredibly popular Twitter feed about the actual "girls" who live in the apartment above him. This is Charlie:

Profile photo from Twitter

He cannot help but listen to their chatter, and he shares very entertaining bits of their conversations, addressing them "Dear GAM" ("Girls Above Me"). A few recent ones:

Dear GAM, “Hey Claire, can I borrow your car so I can pick up my car from the shop?” You might wanna also consider borrowing Claire.

— Charlie McDowell (@charliemcdowell) January 11, 2013

Dear GAM, "Poor Lance Armstrong. It's embarrassing enough that he has erectile dysfunction." Different performance enhancing drugs.

— Charlie McDowell (@charliemcdowell) January 14, 2013

Dear GAM, "I wish I knew a veteran so I could get some of these great deals at Nordstroms." Life. Liberty. Discounted pillow shams.

— Charlie McDowell (@charliemcdowell) November 12, 2012

While I had not heard of McDowell, I became enamored with his posts and was excited by the prospect of doing the cover for his book. My contact at Crown, designer Jessie Bright, provided me with some very rough sketches, a color palette, and some screen shots from my blog that she thought would provide good starting inspiration. The basic concept was a cover that had Charlie sitting on a couch on the bottom half and the legs only of the "girls" on the top half. They asked that I keep the setting very minimal, i.e., do not create two whole apartments, and they also wanted me to use dolls so that it looked intentionally artificial. They wanted Charlie to have a retro/hip look and for the "girls" to be very...yes..GIRLIE!

The first step were the dolls. I normally do not use dolls in my scenes, but had some Kaleidoscope House figures, so I started experimenting. I decided to use my Citadel for this job, since it has the open double-height space.

This doll was not quite right (although they liked his legs), so they asked me to research other "modern" dolls. Jasper from "Twilight" was mostly just for fun...and he cannot sit!

I then suggested the Dad that came with the TOMY Smaller Home and Garden dollhouse.

Courtesy of Andy&Shel on Flickr

Crown LOVED this look for Charlie and were not deterred by the fact that his legs did not bend. I thought I had one in my collection, but couldn't find him. I put out word on my Facebook page to see if anyone would be willing to loan one in pristine condition, and the lovely Susan H. came to the rescue! She kindly loaned him for four months as I experimented with Crown. Thanks again, Susan!!!!

In terms of the setting, I researched some modern lamps and Crown liked this one from miniatures.com. The AG Minis topiary was a winner from the beginning. The flooring is wood grain paper from the Paper Source, and they asked that the backdrop be green, to make it easier to PhotoShop the final walls at the end. I shot "Charlie" on a few different couches. Here are some shots showing various couch options:

Too stylized

Too big

Too small

Too uncomfortable

Too contemporary

Just right! We all liked the grey couch best (created by the lovely Annina), so Crown asked that I do some shots from different angles with a laptop so that we could come up with Charlie's final pose:

Too passive

Too high above

Not quite

YES!!!

With Charlie figured out, I turned my attention to the "girls." I tried a few Kaleidoscope House dolls, but they did not make the cut.

It was a good process to accessorize the space, but Crown decided they wanted it even more minimal. As I was figuring out the furnishings, I suggested using Barbie dolls, since we were going for a truly "girlie" look. I have to admit that I was intimidated by the large scale. I also had to confront the issue of making them stand and pose without stands, since I needed to keep my hands free to photograph. Here's how I did it...

Painter's tape, while crude, did work!

And then I added a third gal, at Crown's request.

The painter's tape approach did work. No Barbies were harmed during the shoot!

I think they worked really well with their lovely little legs! Crown requested that the girls be positioned closer together, and that the middle girl have a more form-fitting skirt. I got some black adhesive felt, which did the trick. I styled the background with one of my favorite vintage Bodo Hennig tables, a Barbie by Jonathan Adler pink lamp, and a cup/saucer and clock by Re-ment. The couch is AG Minis, and the pillow is by minimodernistas. The bag is Barbie's.

With the girls completed, I submitted the photos to Crown in May and they did their magic with the backdrops. As it turned out, Crown had to amend the TOMY doll's face to comply with legal, so he had a bit of a face lift and shirt makeover. They also used the Kaleidoscope Dad's bent legs! But everything else fit into place. 

I am really pleased and excited. The book comes out in June and it's neat to see it on Amazon already.

Cool, right??

This was a great learning experience, and the folks at Crown were a real pleasure to partner with on this project. I'd love the opportunity to do more covers and styling in the future!

Thanks, Crown, and best of luck to Charlie McDowell and his book! I'm definitely getting a copy!!!

Citadel Progress


It's always nice to make progress on a dollhouse that is in "rehab," especially since I have four that need all sorts of work, and I never feel like I pay any of them the right amount of attention. I noticed that I also started out the new year last year with a "rehab" post about two different houses in my collection, so perhaps this will become a tradition!

The Citadel dollhouse, known as "Lolly's Citadel" for the Chicago-area dollhouse store that created the kit in the 1980s, is a formidable structure. As you may know, I drove from New Jersey to Chicago in 2009 to pick up the house, which was decorated in a very traditional style. Over the past three-and-a-half years, I have been slowly renovating and redecorating the house; you can read all my Citadel-related posts here.

I have happily finished rehabbing one side of the house (not including the door), and wanted to share some views of the latest room, on the ground floor. The room was originally used as the kitchen, which is very odd to me, since the room is quite small and closed off from the rest of the main floor. Here is a picture of the house after I picked it up; I brought it to Lolly's to have them check it out:


The colors are so off-putting...hurts my eyes just looking at it again!!

I pulled the kitchen pieces off the wall and scrapped off as much of the wallpaper and flooring as I could.


I decided to make this room a guest bedroom, and kept within the brown, white, and creme palette with a lovely chocolate and silver flower-printed paper from the Paper Source on the back wall, and some cool vintage paper that I believe I purchased from UK eBay. It has a suede-like texture and a nice neutral tone and design. I only had two large scraps, so I measured and cut very carefully!

Here's some photos of the wallpapering-in-progress:

Back wallpaper done!

One side complete!

And the other!

The new wallpapers!
 What do you think? I set up a scene too:

The flooring is also from the Paper Source, but it is not glued. I wanted to leave it flexible.


I gave a piece of felt some fringe for a quick DIY coverlet!


I am happy with the results, especially since the whole side looks more integrated and like an actual home.


While the house is really starting to come together, I still have a ways to go. The main stairwell needs to be put back, and the front tower of windows needs to be repaired. Then there is the balcony on the side of the house, which fell off, and the ground floor on the other side of the house needs to be completely configured into a kitchen. That will take some serious space-planning and thinking!

UPDATE, 1/2/13: In response to Steinworks' comment about layout of this side of the house, it occurred to me that I should share pictures of the *other* side of the house. There's a lot of house here!!! When I mentioned the kitchen being on the main floor, I meant the ground floor in these photos:


(Sorry about the mess!!) So, I'd imagine that the kitchen and eat-in area would be on the main floor, and the upper left room would be another bedroom or study, and a bath on the right. I should also mention that all my houses are intentionally kept flexible...I often change rooms around and avoid committing to a certain plan.

UPDATE: 1/13/13: In response to Megan's request...a picture of the stairwell, when I originally picked up the house. Only the top part is there; there is a bottom set of stairs that broke off.


All of your comments and feedback really keep me going with this and other projects, so thank you! I look forward to sharing more on the house in the months to come!

Here's to a productive 2013!

Credits: Bed, side table, and chair are vintage German; globe lights and red pillow are minimodernistas; shelving unit is by Bruce Dawson; plant is Playmobil; low table is vintage Lundby; yellow bed sheet is fabric from Jo-Ann with felt from Michaels; flowered wallpaper and flooring is from the Paper Source, and side wallpaper is from UK eBay. Accessories are AG Minis, Nancy Tobey, Michaels, Hallmark, Annina, Re-ment, and random eBay finds.

The time it took me: 2 hours, including the scraping and re-wallpapering

Brassy


This scene evolved over a series of days. Inspiration came in spurts, rather than in one fell swoop, which often does happen. I think the scene made its way to completion gradually because I kept adding to it, and also challenged myself on this layout.

I knew I wanted to use these great new kitchen components from the lovely Pepper of MitchyMoo Miniatures (received as part of our fall swap; you can see some of the other treasures I received in this post).  The black glossy top provides such a nice surface for accessories and color, so I employed Asian-themed food items with reds, greens, yellows, and oranges.


Once the food started coming into the scene, I knew I wanted a small dining area with a round table and a dramatic lighting accent. I decided to use a brass metal spray paint for one of my silver arc lamps, bought on eBay some time ago; I have two, so decided to sacrifice one to bronze :) I also impulsively spray painted two orbs with slits, purchased on clearance from Crate & Barrel. These are intended as place card holders, but now they hold magazines!


The area with the couch was the more difficult part of the scene, given its placement in the room...I added a couch facing the kitchen area, and then put in a makeshift coffee table made with a clear vintage Petite Princess table placed inside a brass napkin ring. Gold Japanese origami paper under a "fish scales" stencil paper from the Paper Source animated the space and visually tied in with the arc lamp.


Every time I create a scene in my Citadel, I am reminded how much I love the house (I drove from New Jersey to Chicago and back for it!), and how much I've neglected its renovation! More than 60% of the house still needs work, including the wraparound balcony, main stairwell, front doorway, kitchen, the list goes on...any projects holding you up lately???

And please don't feel badly about your projects. The Citadel is one of four houses that are in active renovation for me:

Citadel

Betsy McCall


Artply Highland

Brio
Perhaps as you are considering your latest challenges, you'll consider entering mine: the Call of the Small/Cubebot Challenge! It ends on December 1, and the winner will get $200 to spend on the AREAWARE website. I am anxiously awaiting your entries -- show me what you've got! All the details are here. Good luck!!

Credits: Kitchen island, counter, and stools made by Pepper of MitchyMoo Miniatures; couch is by Annina; dining table is by abm.models on eBay; chairs are CB2 "Reed" ornaments; shelving unit is by ELF Miniatures; plant is vintage TOMY; side table is Re-ment; coffee table is Petite Princess with a napkin holder; Eames elephant is Reac; flooring under island is a floor sample from Amtico; dining table mat is origami paper; cowhide rug is handmade by Oese. Accessories are lots of Re-ment, Manor House Miniatures, ELF Miniatures, Mighty World, Lilu Shop on Etsy, and random eBay and dollhouse store finds.

The time it took me: 1 hour, 43 minutes, over a period of three days

No House is an Island


Well, here's an interpretation of the well-known John Donne quote "no man is an island." I know I cannot thrive without my houses and they likely would miss me too, so...I arranged some of my vintage mini homes in my Citadel and enjoyed playing with them again. I showed some of them in this post back in 2010 and was reminded how fun they can be to photograph. I got most of these from US and German sellers on eBay and always keep my eyes open for them. They were mostly made for railroad scenes, and are HO scale (1:87).


See me in the reflection??


The coffee table is vintage LISA!

This is from a Paper Source 2012 mini calendar -- it's the month of July :)

Incredible detail in the long windows


The fantastic lemon yellow midcentury couch was purchased from Patricia, who is now selling her wonderful German room box; see the photos linked here on the Call of the Small Facebook page. The room box folds and is really lovely.


Pat is the original owner and hates to see it go, but she'd love to find a nice collector's home for it. If you are interested in the house and the remaining furnishings, email me at call-small(at)call-small(dot)com.

In addition to the awesome vintage LISA coffee table (love the pattern!), another new piece making its debut is the round table in the middle:


The table is from an eBay seller based in Israel, Avi of abm.models. His pieces are quite nice and affordable. I will be watching his work!

Alert: Keep your eyes peeled on this space for an awesome giveaway from Safari Ltd! 


I know I have some blogging pals out there who have grooved on TOOBS and other mini replicas by Safari. Their products are high quality and super fun and the nice folks at Safari will be giving away a few goodies to my readers! Stay tuned!!!!

Credits: Couch is vintage German; coffee table is vintage LISA; arc lamp is an eBay find; Barcelona chair and Eames elephant are Reac; plant is AG Minis; all mini homes are vintage eBay finds; bike is Maisto; round table is by abm.models on eBay; carpeting is scrapbook paper from Michaels. Accessories are handmade by The Shopping Sherpa, Miniatures by Annina, and eBay finds.

The time it took me: 52 minutes

Floating Desk


This desk floats in my world.

Why?

Well you can't see it here, but my houses and collection are in complete disarray right now and I wish I could float above it all. I feel so guilty about the sad state of my things, and really need to buckle down and clean it all up into some semblance of organization.

Any good tips to get me started?? It's not like I haven't done this before, but I think I need some new ideas. How do you motivate to clean it all up?

The precariously slanted desk is courtesy of Staples, specifically a clear plastic business card holder...see?


The desk rises above a neat little floor, created from a cut-up place mat from Marshall's. Once I snipped off a few of the strings holding it together, they cascaded down, dashing my hopes for a neat little square.


So, I picked up pieces randomly and quickly laid them out, hoping they would fit neatly. Notice the random assortment of stuff lurking outside the house. Yup.


Wish me luck as I conquer the mess.

Credits: Chair is Reac; desk is a business card holder from Staples; credenzas are vintage German; light is a vintage Lundby floor lamp; plant is an eBay find; side table and wastebasket are Re-ment; flooring is a cut-up place mat; large wall artwork is a key holder turned upside down with charms from Michael's. Accessories are Re-ment, Manor House Miniatures, handmade by The Shopping Sherpa, ELF Miniatures, dollhouse show finds, and beads from Michael's and Jo Ann Fabric.

The time it took me: 35 minutes

Blond Contrast

I was going for a refreshing contrast of color here in the upper "loft" space of my Citadel. The new roll of Con-Tact paper (I used the darker wood here in my Villa Sibi) was the starting point, and the everything else fell quickly into place: shiny stainless, red, white, and brown. I tend to try to accessorize accordingly, so you will see those colors/materials in the new shelving unit I purchased from the recent miniature show I attended.


BIG fan of the Con-Tact! Easy peasy.

Credits: Couch and planter are vintage eBay finds; chairs and Eames elephant are Reac; shelving unit is by Bruce Dawson; pillow and rug are by minimodernistas; "coat rack" is an ring holder by UMBRA; artwork is handmade by me (pretty poorly!); mini knights by the door are by Accoutrements; outdoor tree is from a miniature show, and its planter is by Manor House Miniatures. Accessories are AG Minis, Re-ment, handmade by The Shopping Sherpa, beads, from JaZams, and Nancy Tobey.

The time it took me: 17 minutes

Citadel Rink Table


A trip to the Crate & Barrel outlet in Cranbury, NJ, never disappoints...for 1:12 and 1:1!! We were shopping for some new pieces for our kids' rooms, and I left with a few cool items to repurpose from the clearance bins. I cleaned out the main living space in my Citadel house and set up a scene guided by a new silver and bronze-edged metal circular votive holder ($2.50). Looks like a magical skating rink! I filled the center hole with a vintage wooden bowl and moss, and for a base, I used a lava lamp cover, which suited it pretty well (its previous incarnation was as a modern pendant light fixture).

I wanted to bring together all sorts of textures, so I added a piece of burlap from the Paper Source and covered my Kaleidoscope House kitchen counter unit in one of my favorite papers from Kate's Paperie. The artwork on the wall is a silicone coaster from Crate & Barrel, also on clearance (.75). For the other side of the room, I used a vintage German table and chair and some Fisher Price tables on the wall, with a sweet Eames elephant and an AG Minis plant.


Like it? The lighting was totally rigged, by the way. One of the beauties and challenges of the house is the dramatic overhang -- the space below can be a bear to photograph without some light through the windows. So...

Ugly, but it works!

Credits: Table and wall art are from Crate & Barrel; chairs and kitchen counter are Bozart; bike is Maisto; desk table and chair are vintage German; Eames elephant is Reac; light fixture and green rug are by minimodernistas; burlap rug is from the Paper Source; plant is AG Minis; wall shelves are vintage Fisher Price tables; magazines and file holder were handmade by The Shopping Sherpa; books were a gift from Margaret. Accessories are Re-ment, doll house store finds, craft items, Mighty World, ELF Miniatures, and vintage German eBay finds.

Re-ment: The water bottle is from Sushi Bar #2, and is good for 1:12.

Citadel Muck-About


I would not be surprised if you are confused by this room (what is it supposed to be, exactly??). I was very confused getting there, so it's not just you!

I had wanted to show you some progress in my Betsy McCall House, but no dice, and I instead decided to do a "quick" overhaul of this upstairs room in my Citadel. Not so quick as it turns out.

I was convinced I had to change the wallpapers that had been tacked up from the last scene I did in this room, almost exactly one year ago to the date (that's actually pretty spooky). I love the papers, but wanted to use a particular sheet of scrapbook paper for the floor that in no way matched and I got super stubborn about using it. I kept trying to match wallpapers, and cut and sized at least three different kinds and nothing worked. After a lot of back-and-forth, I decided to use the lovely geometric flowered paper on the back wall only and then a place mat for the floor. This worked much better. I then brought back the original two papers (yup) for the other two walls and proceeded to kick myself for taking them off in the first place.

By this point I was completely exhausted and puzzled about what to put in the room. I put in an old fashioned sink first and liked how nice it looked against the wall. Not wanting to do a kitchen, I decided to do a modern, clean, "muck-about" room, one in which you could tidy, eat, or read. My littlest son has "muck-about" Fridays at his preschool, where the kids basically do whatever they want in the playground. Mud and dirt are pretty popular, but they couldn't be happier. (By the way, I admit some inspiration for "muck about" from my adventure cleaning bubble gum out of the nooks and crannies of my dryer this weekend after a load of laundry emerged suspiciously streaked in pink!)


How do you muck about in your dollhouse??

Speaking of mucky, I acquired a Princess Patti kitchen sink unit as part of my Besty McCall house purchase, and it was in a pretty dirty state. I was really happy to get it, especially with its original set of dishes. I gently cleaned it up, but then saw that a lot of the gold paint had worn off and tarnished in places.


I recalled a gold poster paint Sharpie from a kid's project and set to work refinishing my Princess Patti kitchen sink. What do you think?


I also wanted to share another little treasure from my McCall purchase, which is actually in pristine condition: an unusual wooden Japanese tea set in a box, labeled "Shirokiya," which I discovered is a department store in Hawaii that also sold items in the mainland. Anyone ever see anything like this?


Credits: Sink is a dollhouse store find; wooden planter/receptacle is Manor House Miniatures, filled with a cut piece of natural sponge from the SFMOMA store; mat is a window shade sample from Lowes; Expedit shelving is by ELF Miniatures; console is PRD Miniatures; zigzag chairs are Reac; chair and table are Hall's Lifetime Toys; lamp is vintage German; magazine holder is Re-ment; topiary is AG Minis; flooring is a place mat from Bed, Bath, and Beyond; wallpaper is from the Paper Source; cork behind console was bought at a tag sale. Accessories are Re-ment, Nancy Tobey, AG Minis, vintage German eBay finds, ELF Miniatures, Chrysonbon, Manor House Miniatures, and random dollhouse store finds.

The time it took me: 2 hours (all that sizing and cutting of unused wallpaper! Blech!)

Tidy

Ever sigh with relief and revel in proud accomplishment when you tidy up your work and creative space? I know a lot of my blogger and collector friends find this a necessary, albeit challenging step in being able to continue to set up scenes and play with their collections.

In my case, I have accumulated a great deal of fabric and paper and I couldn't use them effectively because I couldn't FIND them! They were buried under each other and entwined in a mess of pattern and texture (and not in a good way). Also, because this mess had propagated throughout my work surfaces, I had no place to craft, cut, etc., and had to migrate to our dining room table, an impractical solution.

With the excuse of my birthday being a few days away, I decided to kick my childish habits and get organized in a smart way. I reused an old kitchen table and covered it in a durable, silver ironing board cover material for a multi-use surface. I actually wanted to find some neat oilcloth, but the Marimekko ones were a bit too pricey (for now). After cleaning up some clutter in our laundry room, I decided to fit my table in and have that be my fabric/work space:


Artwork by my daughter inspires me

Given this is in our laundry room, I am trying to convince myself that the environment is industrial chic, but I think I need to try a bit harder.

With my work table set up, I then organized all my scrapbook papers, longer sheets of more delicate papers, and wallpaper rolls in my work room, home to my houses in "rehab": the Citadel and my VERO.


I felt much more organized, and decided to turn my attention to a soap dish that I recently purchased at Bed, Bath, and Beyond for $5.99:


I definitely saw potential for a room divider (I got two) or a headboard. I chose to pursue the latter, but not before I looked at the plastic card and saw a mate for one of the two Lundby tabletops I received from Julie of Vintage Lundby (check out her blog -- it's filled with Lundby inspiration, and she is an incredible resource on all things Lundby):


(My other vintage Lundby tabletop now lives in Australia with The Shopping Sherpa, as it was one of the parts of our swap; you can see it in the Day Seven picture here.) All I needed was a little glue for the tabletop to work as a canvas, and I put it aside for an evening to set.

My last burst of craftiness was the large pendant lamp in this tidy little scene in the Citadel. It is made from the top of a discarded lava lamp given to one of my kids three years ago and never used. The gooey, yucky lamp matter in the bottle went out, but I decided to keep the top. I poked a hole in the top and strung some leftover wire through. I'd prefer it if it were a bit smaller, but decided to forge ahead.


I'm pooped!

Credits: Bed consists of a soap dish for a headboard and another marble one for the hidden base, in addition to a dollhouse mattress; coverlet, matching pillows, and green filing box on desk are handmade by The Shopping Sherpa; red pillow is minimodernistas; pendant light is made of a lava lamp top and steel wire; side tables are planters from a dollhouse store turned upside down; artwork is a vintage Lundby tabletop with a graphic from the soap dish packaging; plant and purse are AG Minis; desk is by ELF Miniatures; chair is Reac; shoes are Barbie; garbage pail is Re-ment; lamp is vintage German; cowhide rug is handmade by Oese. Accessories are Re-ment, ELF Miniatures, beads, handmade by me, and dollhouse store and eBay finds.

A Happy Clutter: Ladies' Home Journal


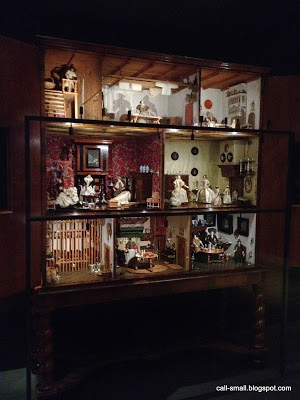
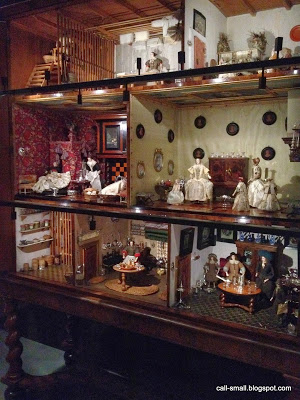
I am thrilled to share the results of some hard work and fun during some weeks in late December and early January. I hinted at something in this post, and I can now finally let you know that my photography and styling of a modern miniature interior is in the April 2011 issue of Ladies' Home Journal!


Back in late December, I was approached by Clare Lissaman, the photo director for the magazine, which, with a circulation of four million, is one of the more widely-read lifestyle publications in the U.S. She had seen my blog in the New York Times article from April 2010 and had an interesting idea for photography for an article they had planned on decluttering your home (and life). Could I create a very messy, messy interior in one of my dollhouses, and then neaten it all up? Could I come up with the concept for the room, style it, and then photograph both the messy and the neat scenes in an identical fashion? And could I complete it in a matter of weeks?

Y E S!

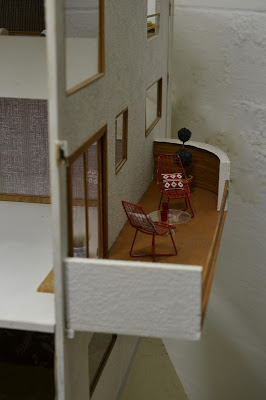
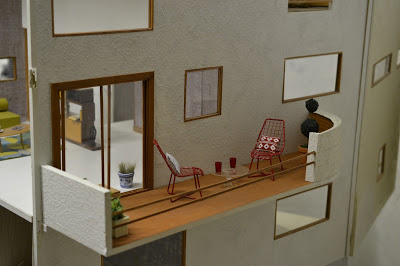
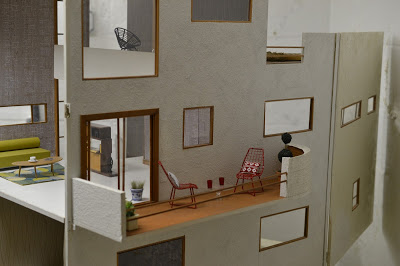
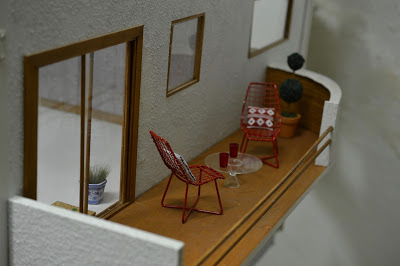
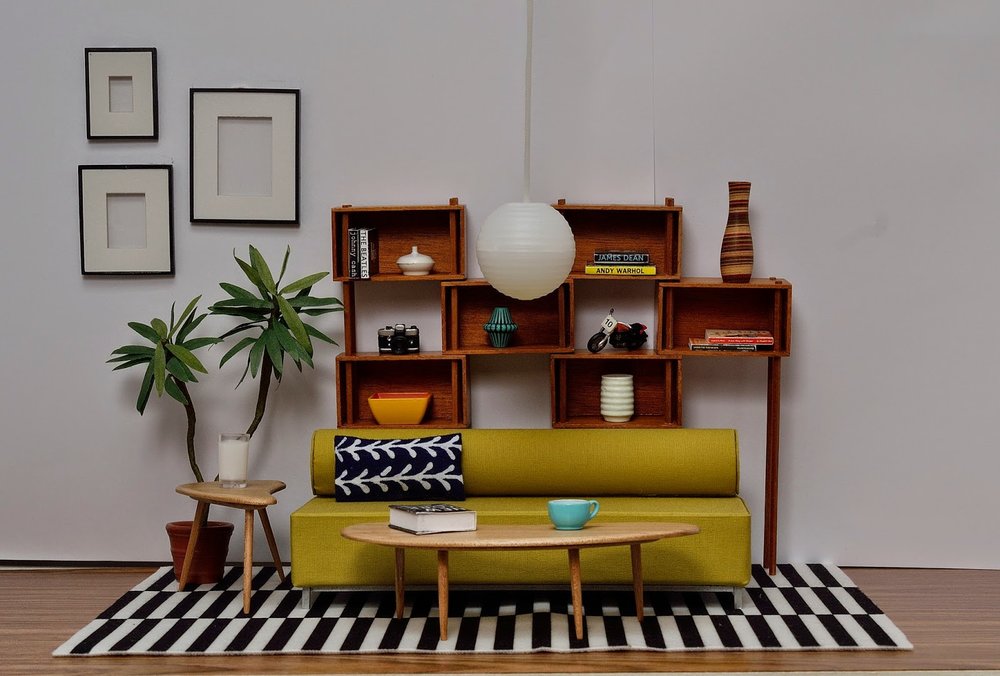
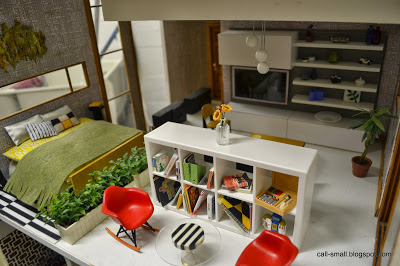
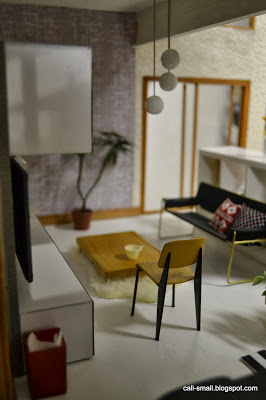
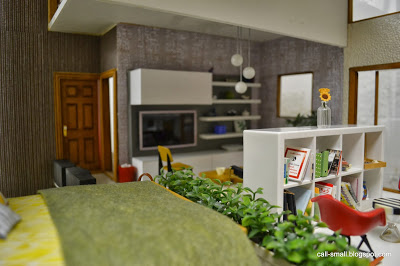
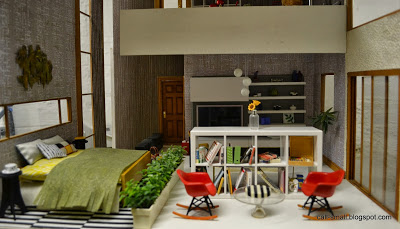
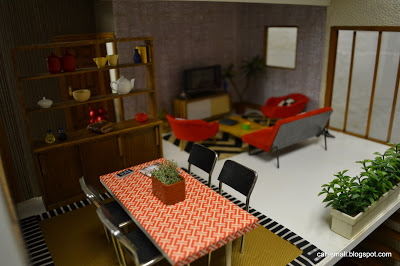
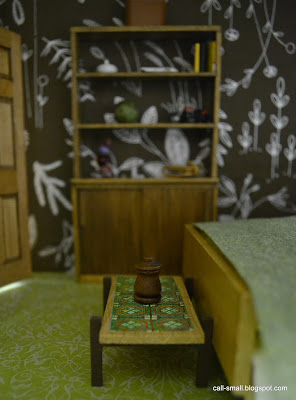
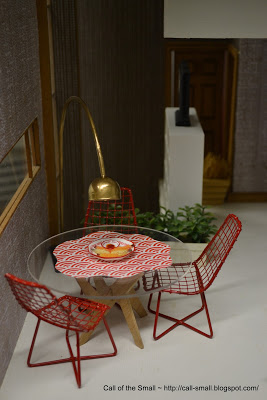
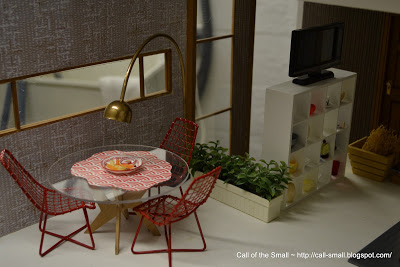
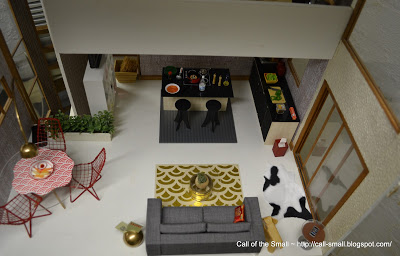
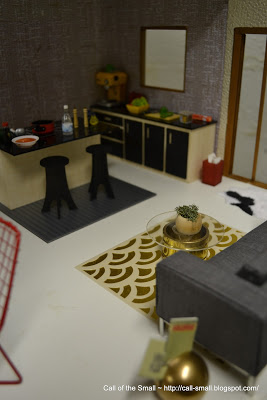
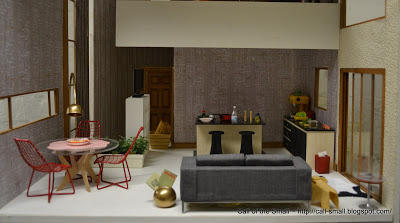
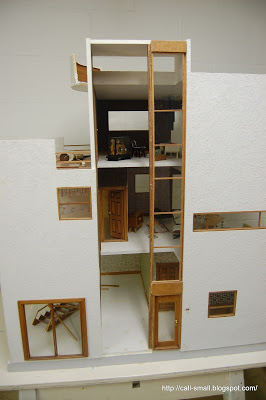
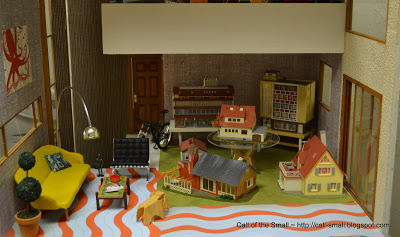
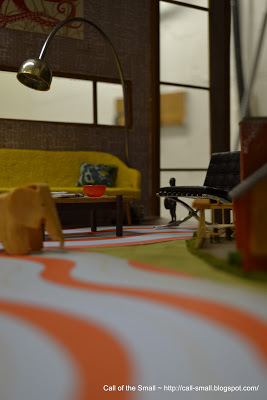
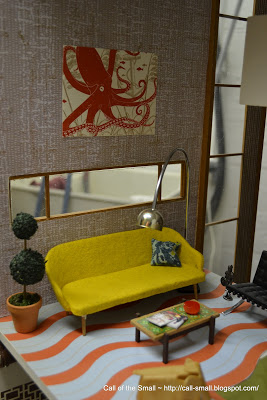
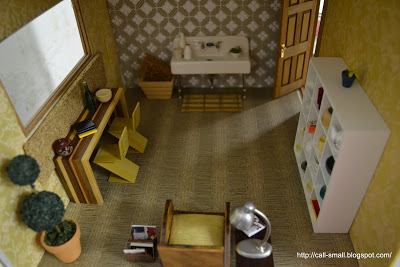
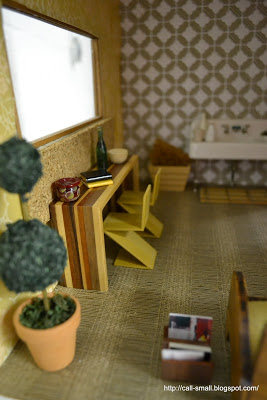
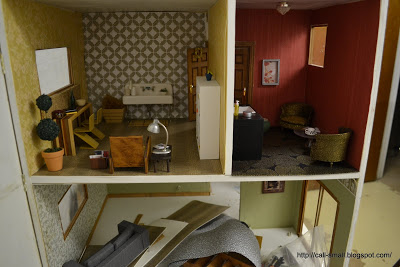
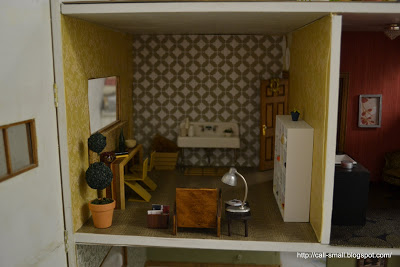
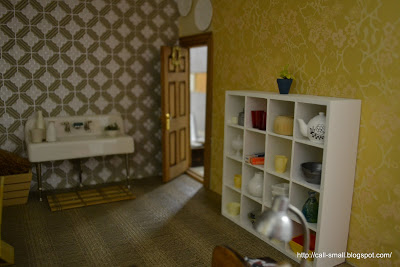
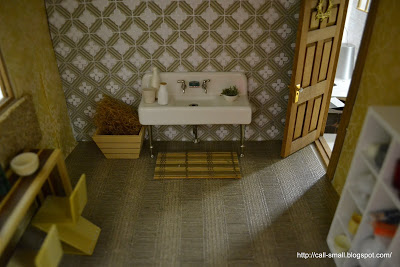
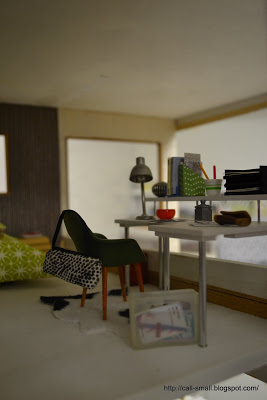
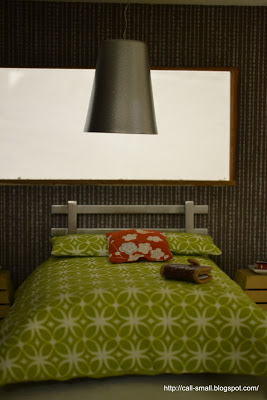
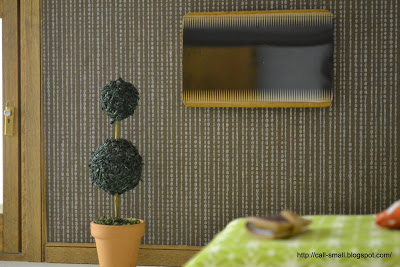
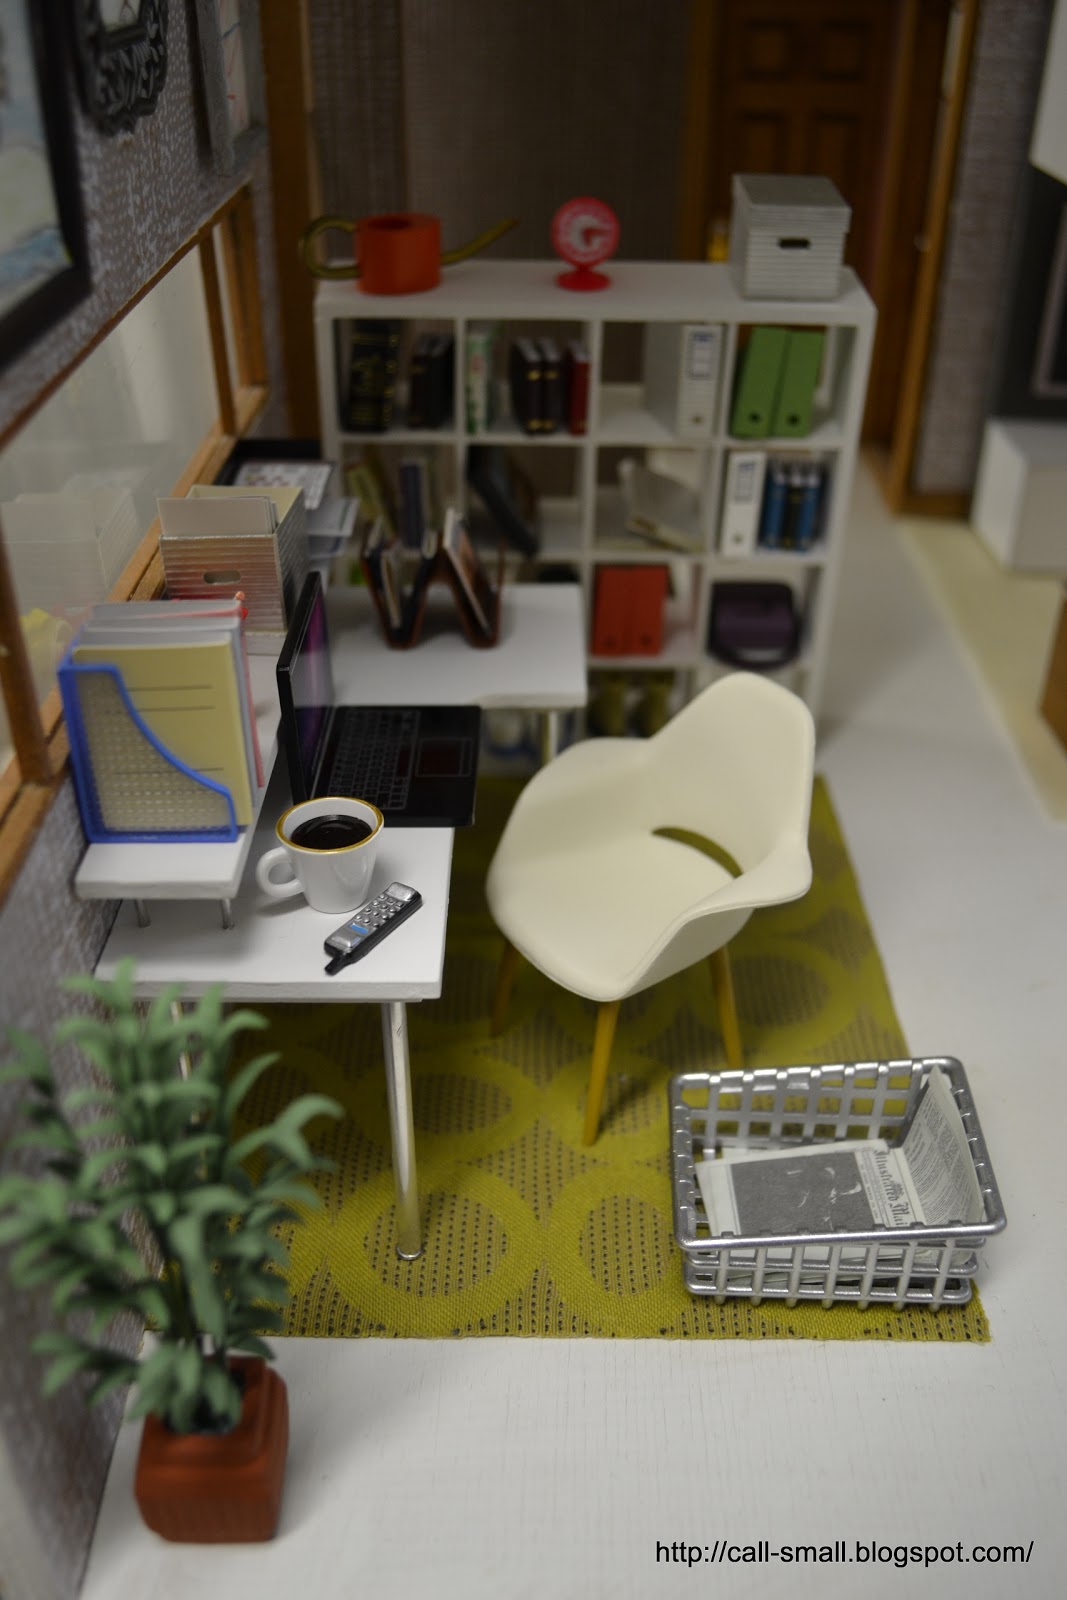
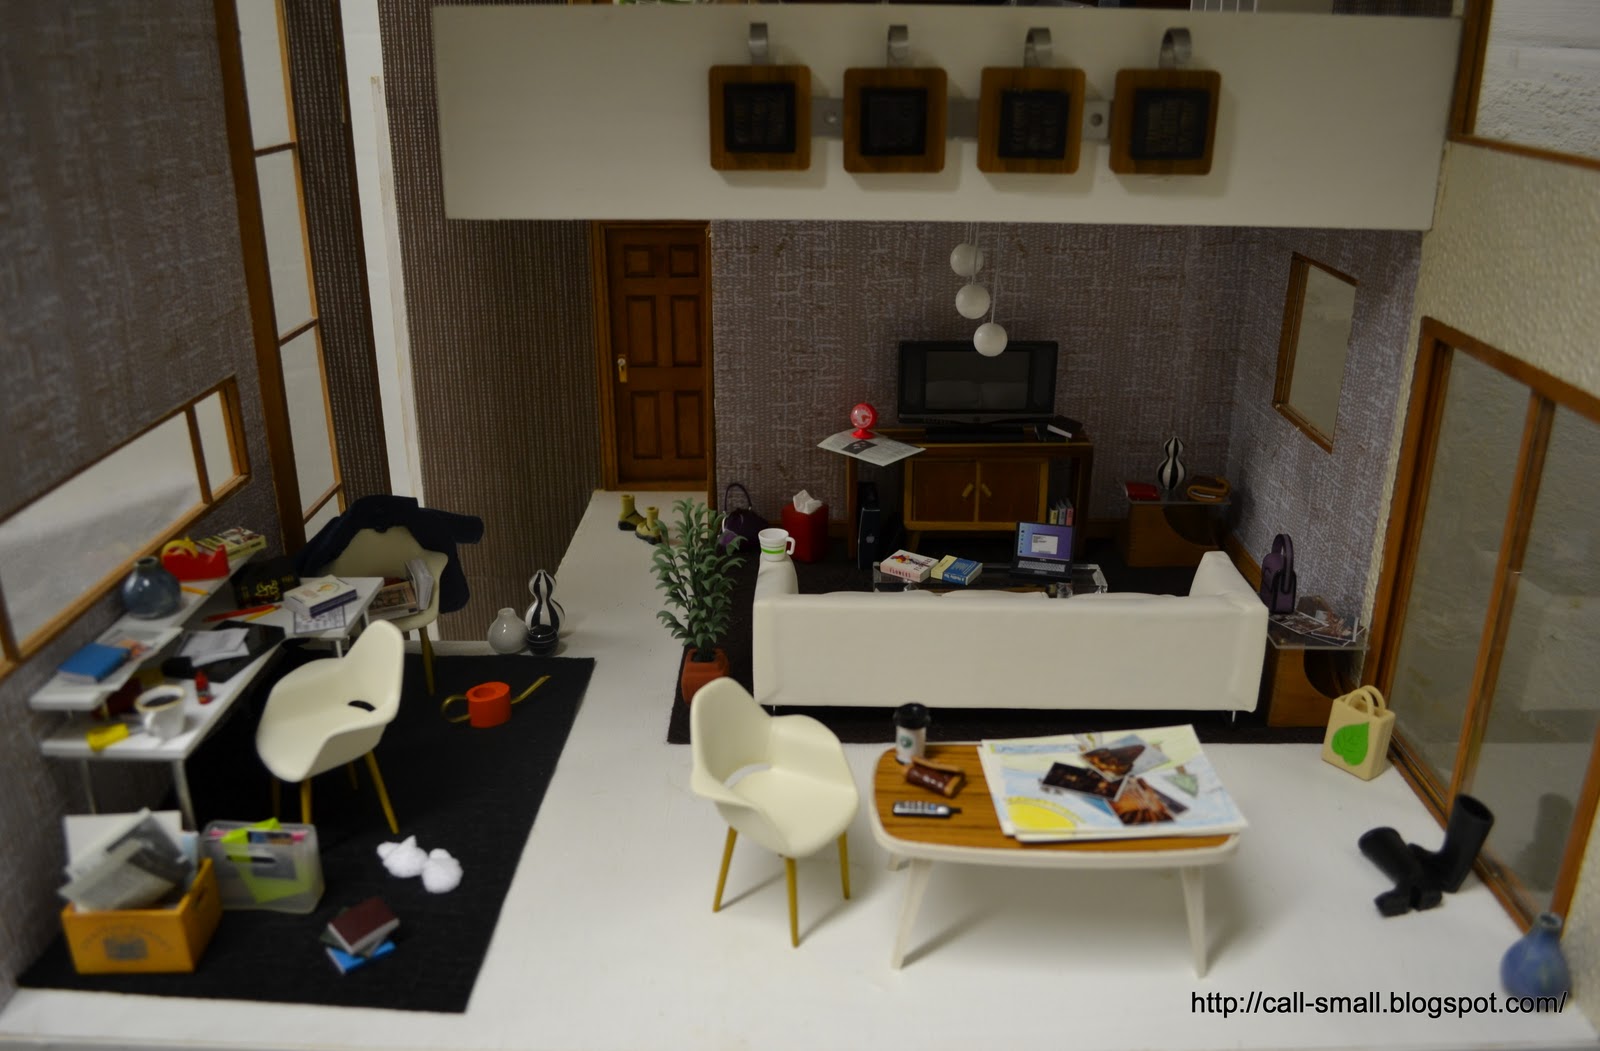
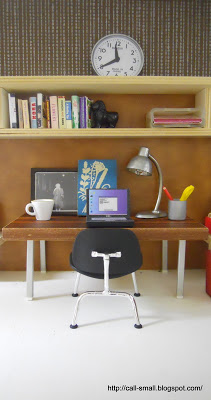
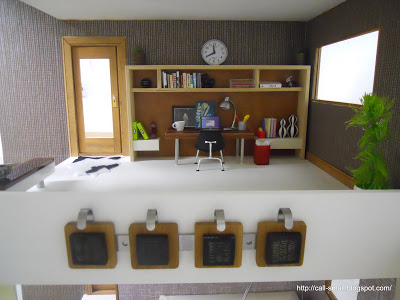
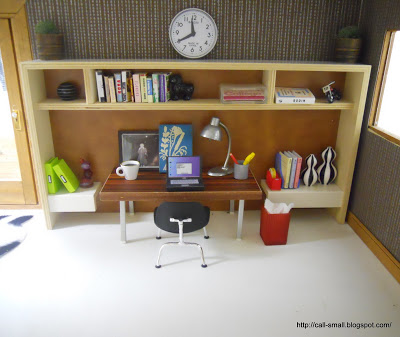
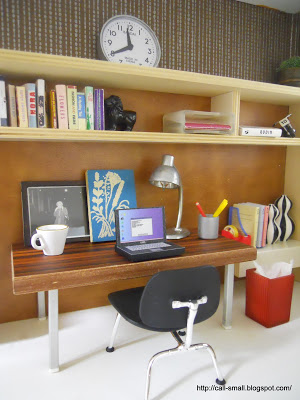
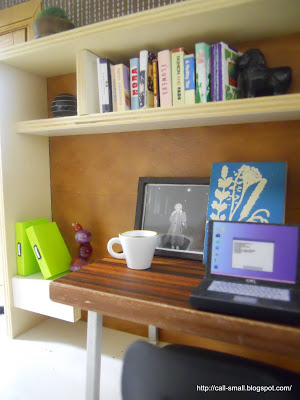
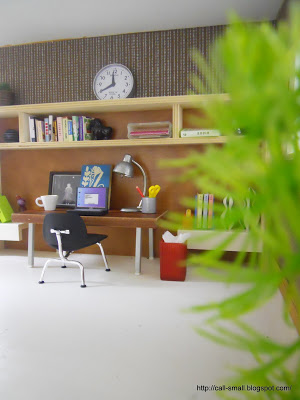
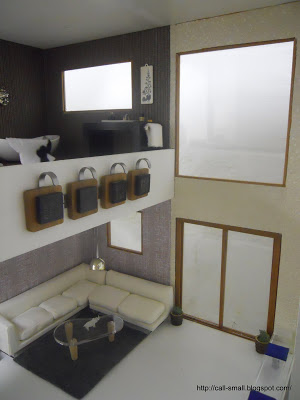
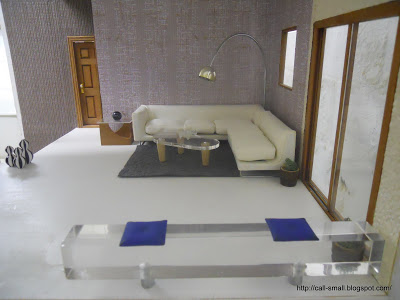
I felt very flattered and honored to be asked and really wanted to make the most of the opportunity. Once we had agreed that the main room in my Citadel would serve as the "set," I came up with the basic layout of the room (living area with office and small eating space), and turned to the article for inspiration. Some of the ideas that resonated with me were: use furniture such as an 
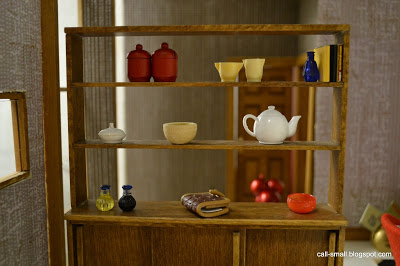
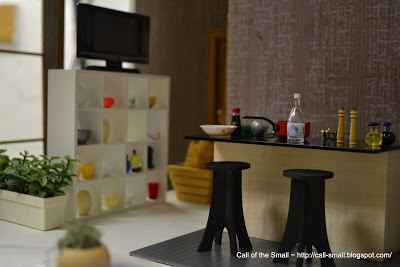
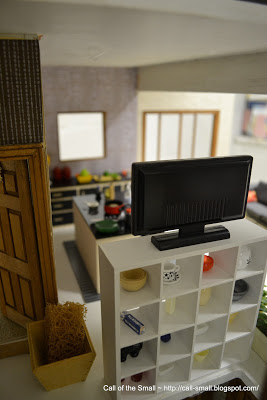
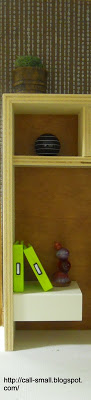
IKEA Expedit shelf for neat storage and display of items; select just some of your children's artwork and frame the pieces, instead of keeping every little scribble; use filing folders and other accessories to better organize your work space.

Inspired, I contacted Elisabeth Le Pla of ELF Miniatures, Doris Nathanson of minimodernistas, and Paris Renfroe of PRD Miniatures to purchase some key pieces of furniture and accessories. Each artisan worked very quickly to make and send their pieces by early January, and I set to work. I wanted to create the basics of the scenes and provide test shots to the magazine to ensure that everything was on track.

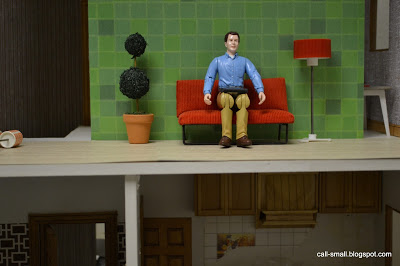
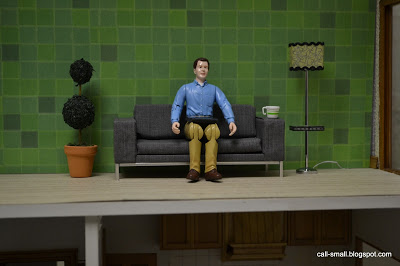
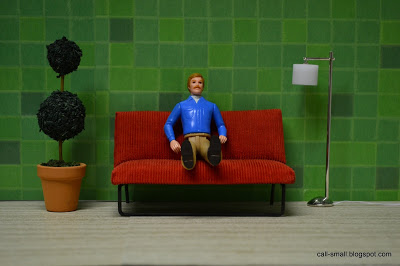
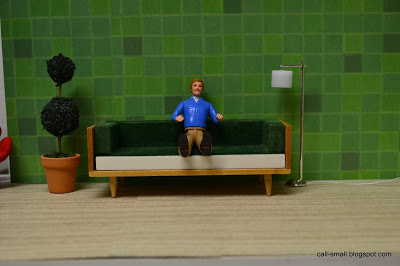
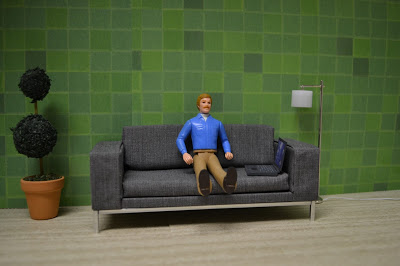
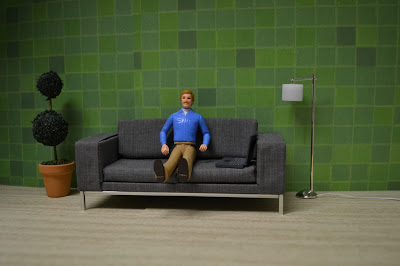
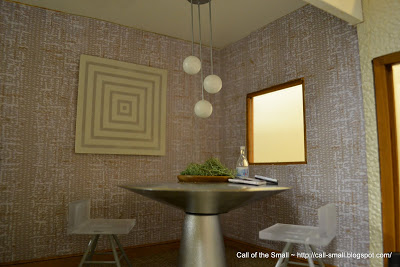
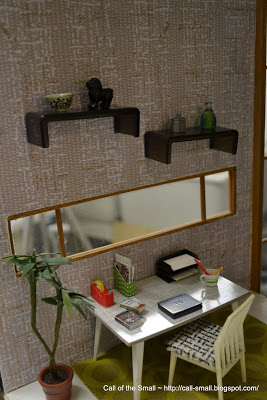
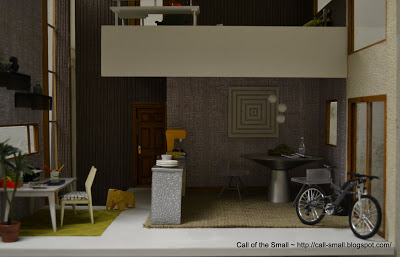
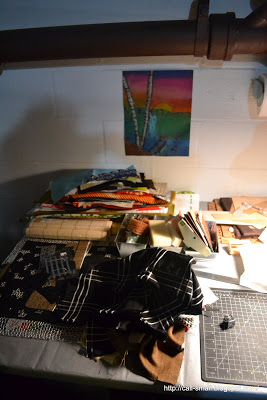
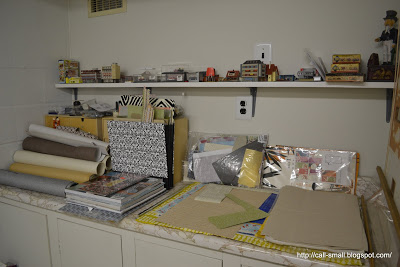
Here's a look at early iterations of the messy and neat rooms:

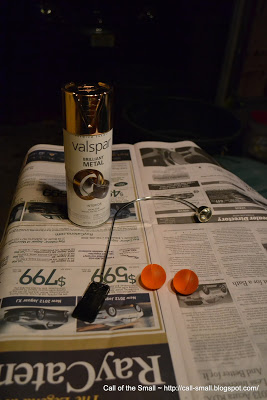
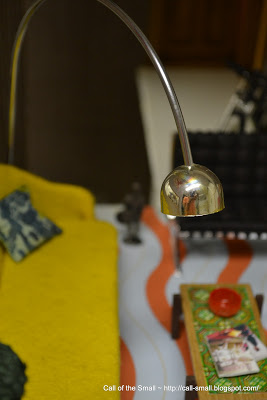
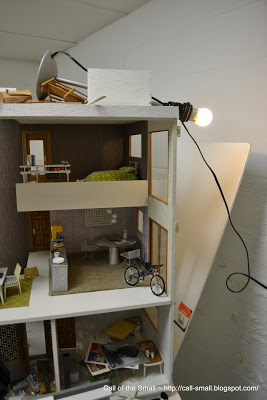
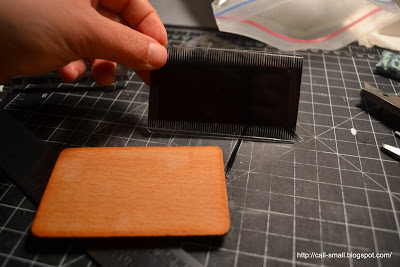
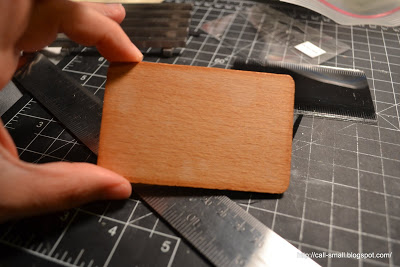
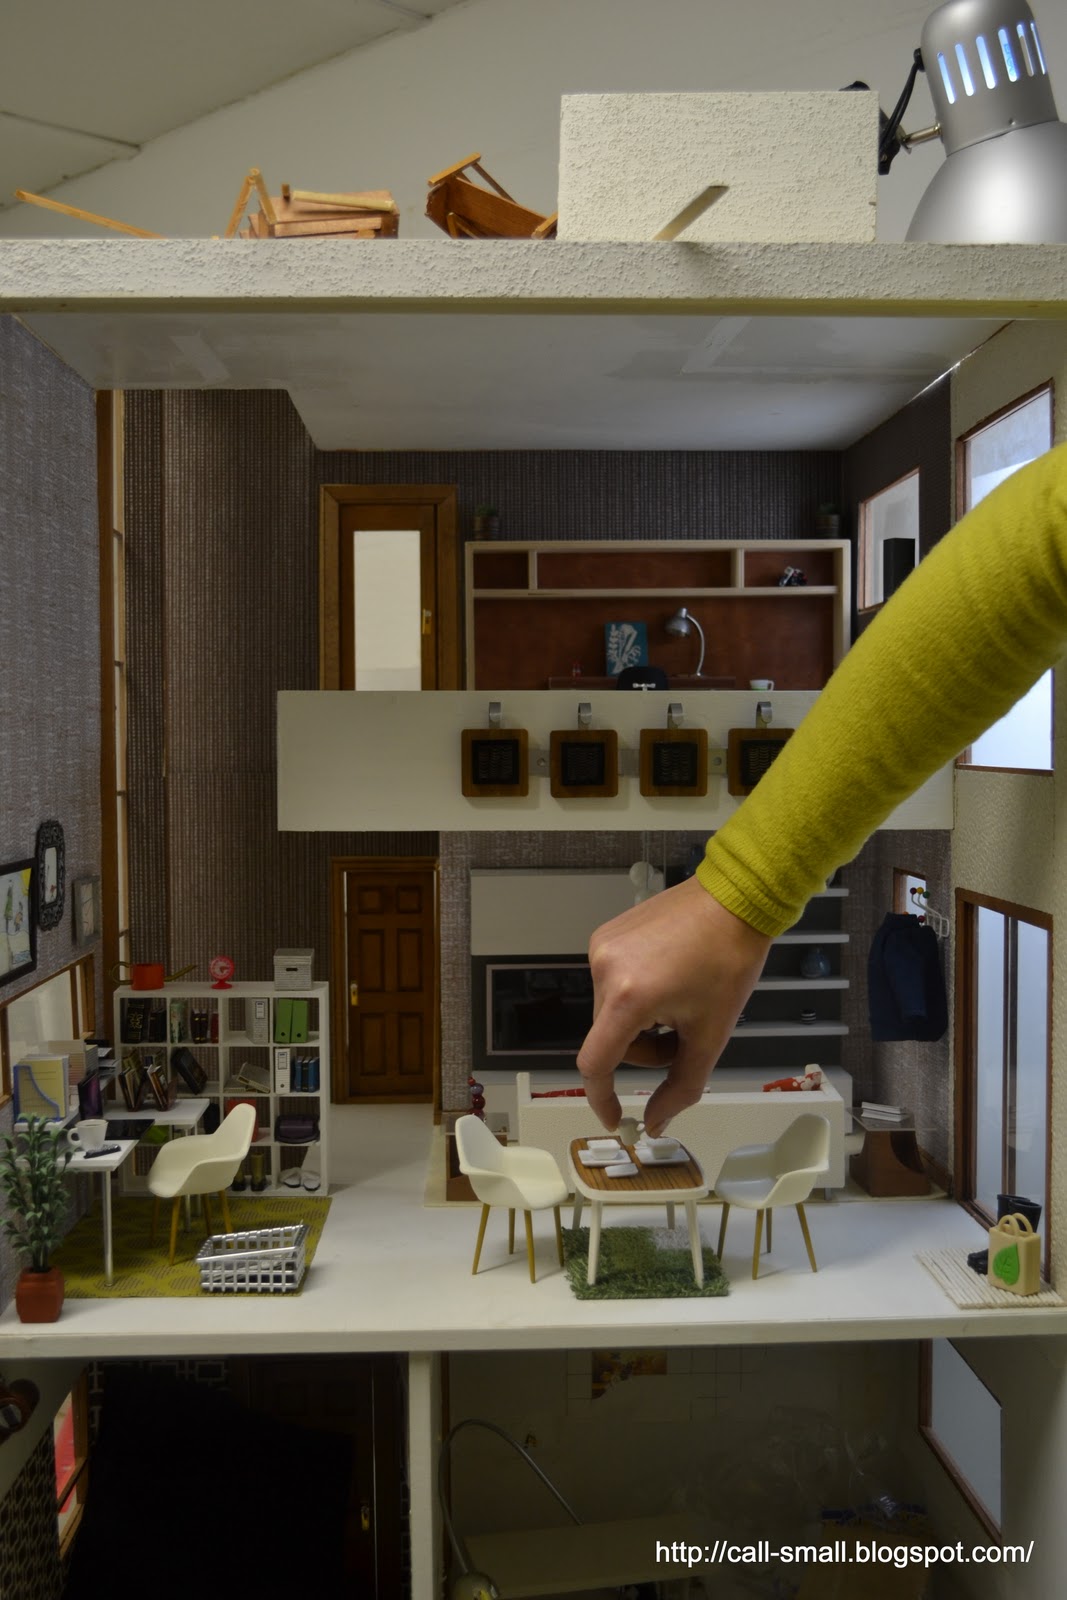
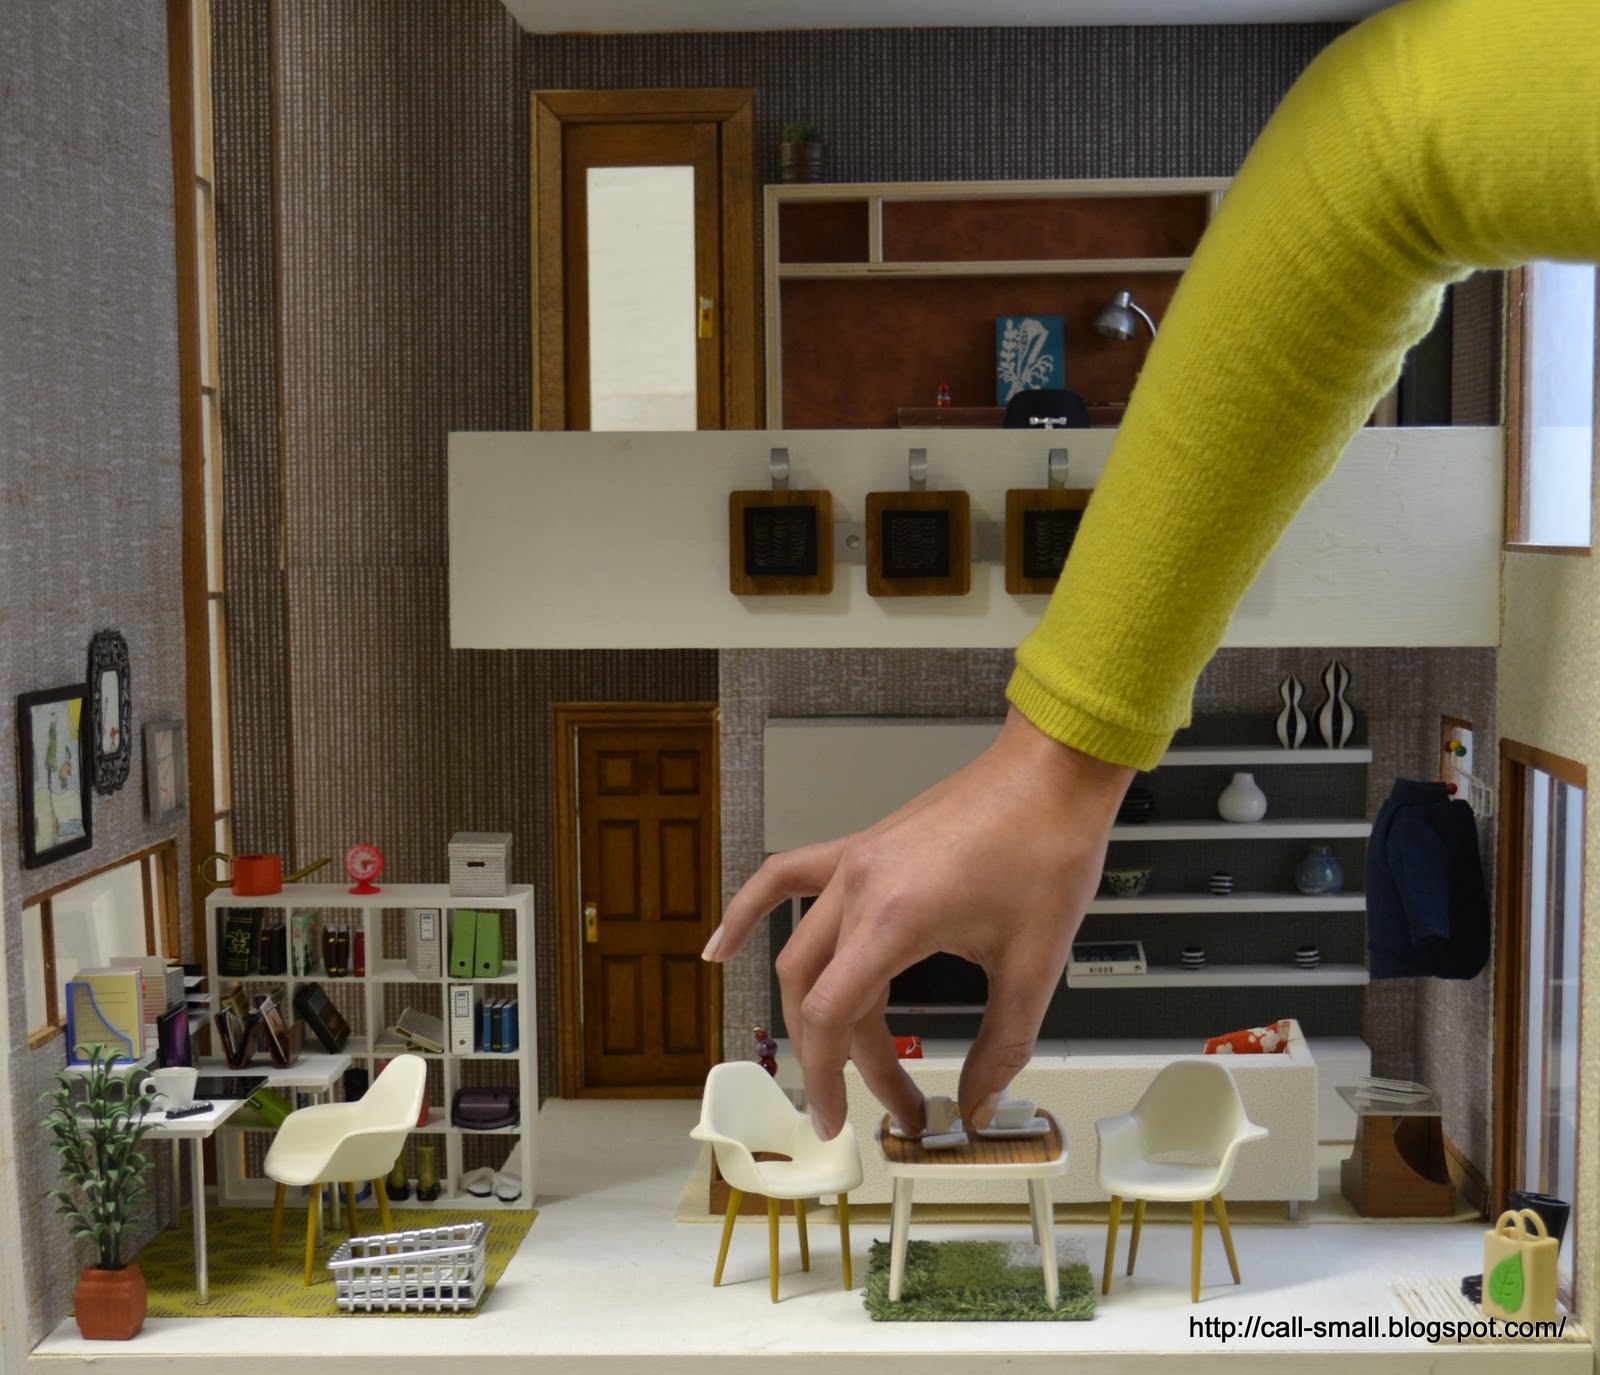
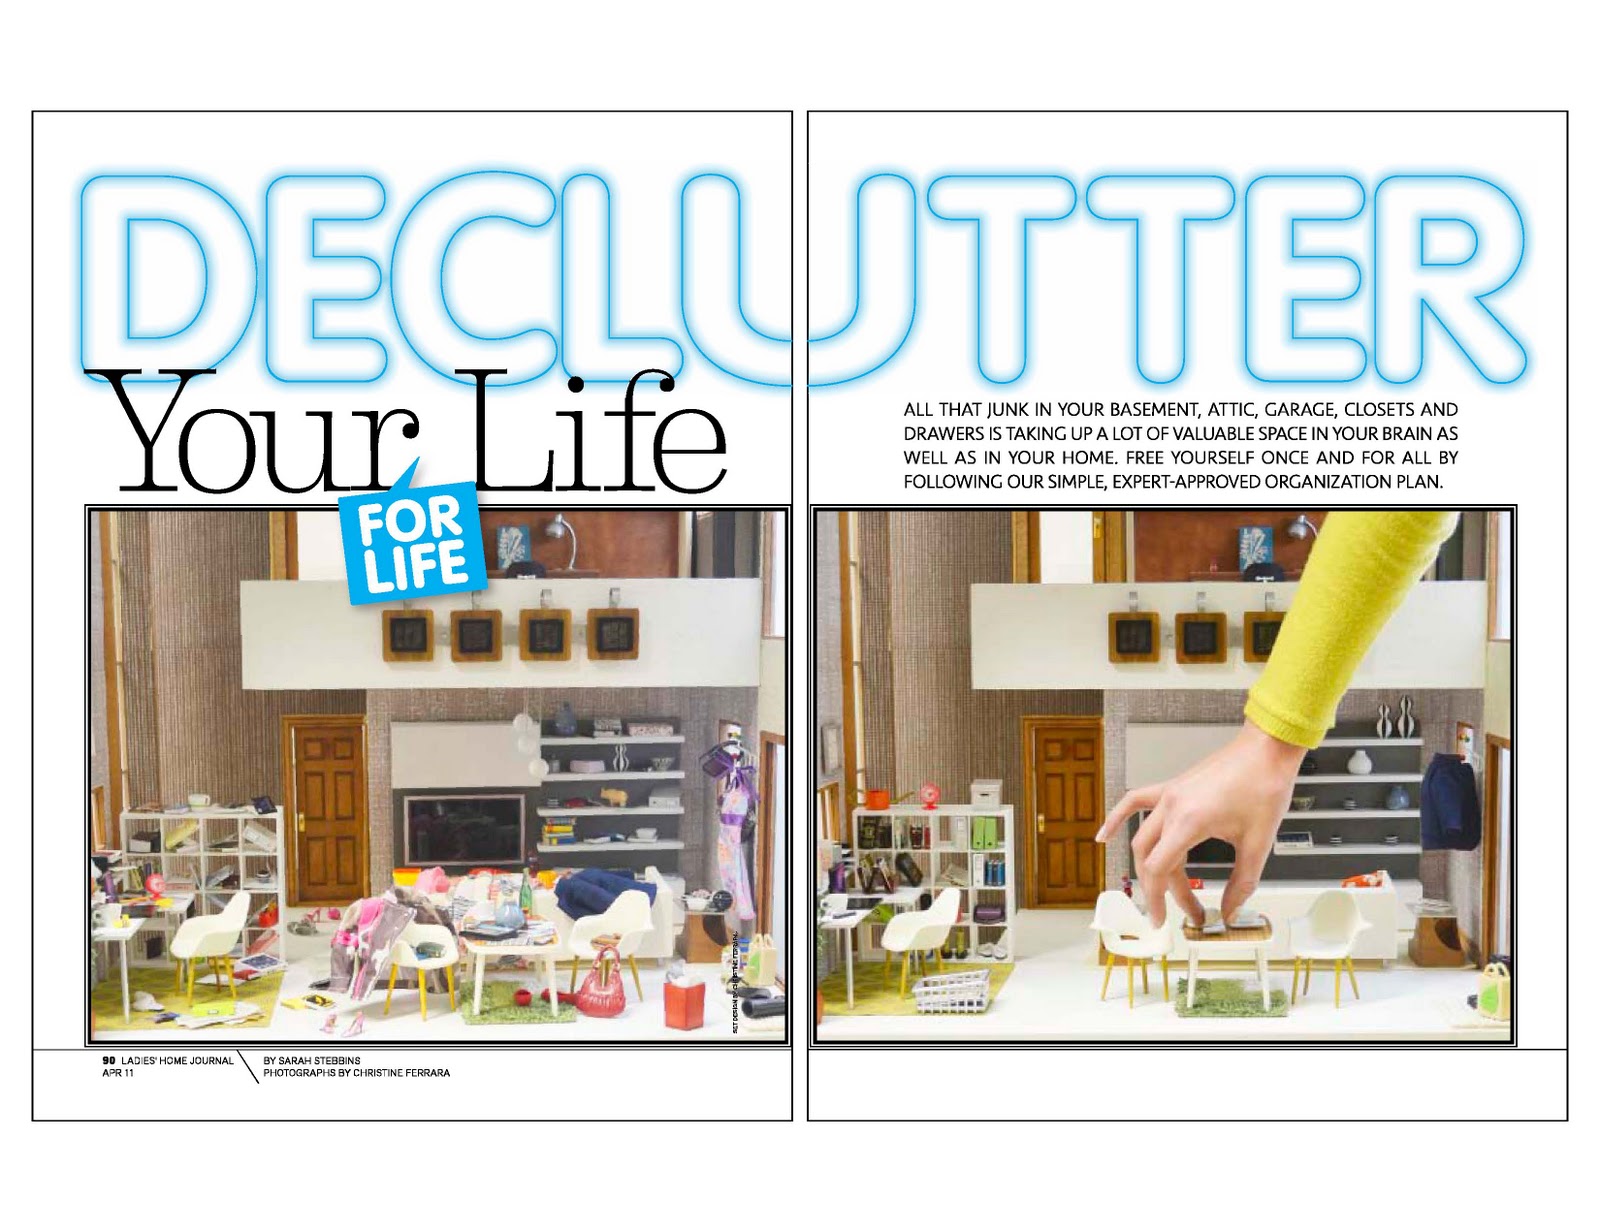
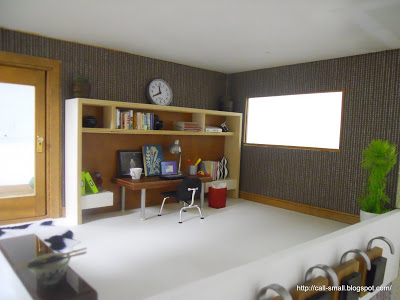
As you can see, my original concept was to have the messy room not have the final pieces that appear in the neat scene. The magazine thought it best to have identical pieces of furniture used in both scenes, and have their placement in the room match. In addition, I had to adjust the overall lighting, the color of the rugs, and had to photograph both scenes from the same exact angle. And the kicker: I was asked to hire a hand model to reach into the neat scene and provide a sense of scale. I hired one for an afternoon and crossed my fingers that her lovely hands would do the talking. I also worked on the lighting by putting a fixture on the roof and shining it on a board that reflected more natural light into the house.

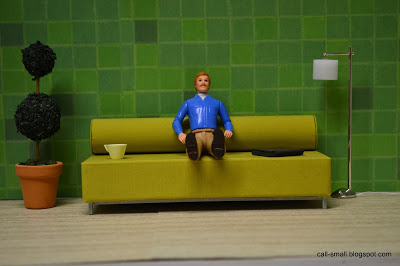
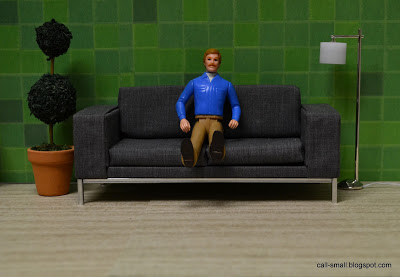
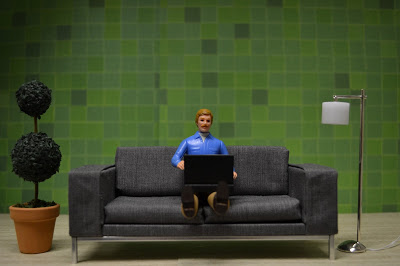
My next efforts were more on target:

LOTS of trial and error with the hand model -- and look at all that mess above and below!
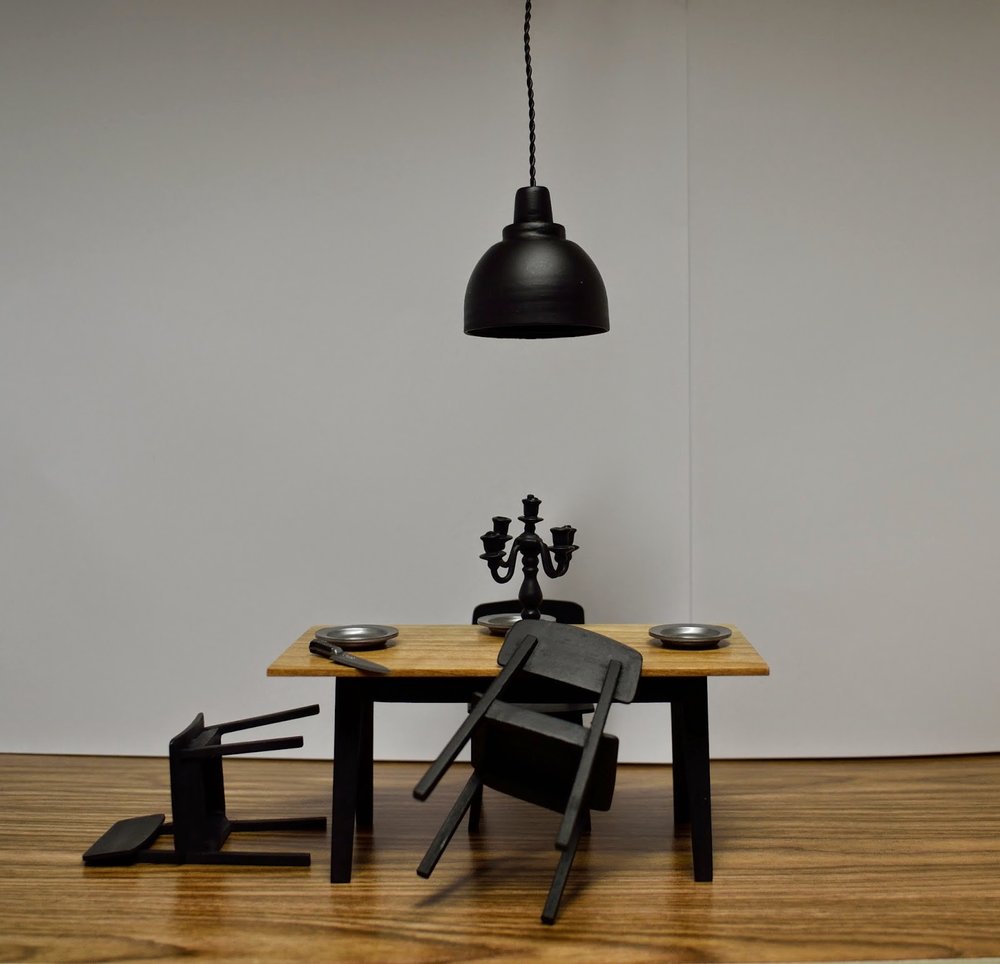
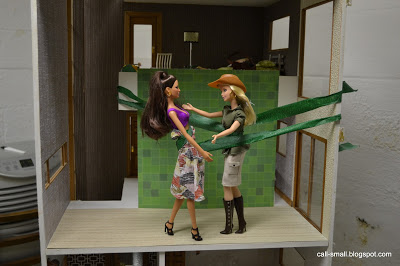
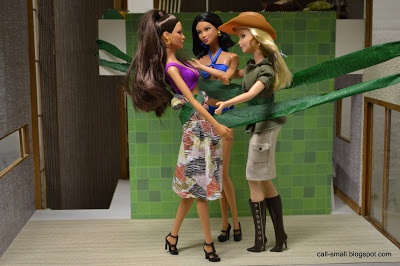
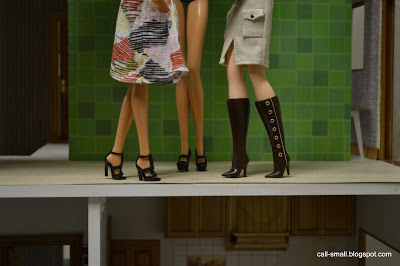
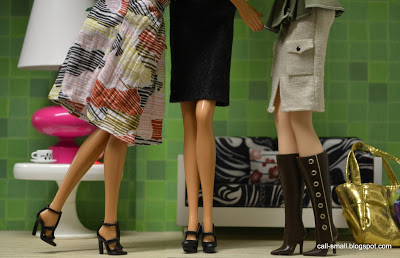
After refining the hand model pose in the neat scene, I was told to mess things up even more, and to make an exaggerated level of clutter with more clothing, shoes, papers, bags, etc. This was hard, folks, very hard, since I am used to creating more ordered scenes instead of ordered chaos! Realizing I did not have much in the way of shoes or clothing, I bought some Barbie and Liv doll accessories at Target and put them everywhere, short of hanging them from the ceiling!

The final results:

Only part of the hand model's arm made it into the final picture
I finished the job in mid-January and have been on pins and needles waiting to see the final print copy, which hits the newsstands tomorrow; here's an advance pdf with web quality -- I hope to post an actual scan soon:

The online version is here. The nice folks over at the magazine did a blog post about the back story behind the story here -- check it out!

I am incredibly pleased with the outcome and am so happy that I was able to make a contribution to the issue. I am also grateful for Clare's faith in me and in this unique concept, and I hope to work with them in the future!

A BIG THANKS to everyone who has voted for Call of the Small for Best Miniature Blog in About.com's Readers' Choice Awards. Right now it is looking like I have a good shot at third place, but I'd appreciate your last votes today (if you haven't voted already) and tomorrow. The voting ends tomorrow, March 8. You can vote HERE. Voting is now closed.Thanks for your enthusiasm and support!

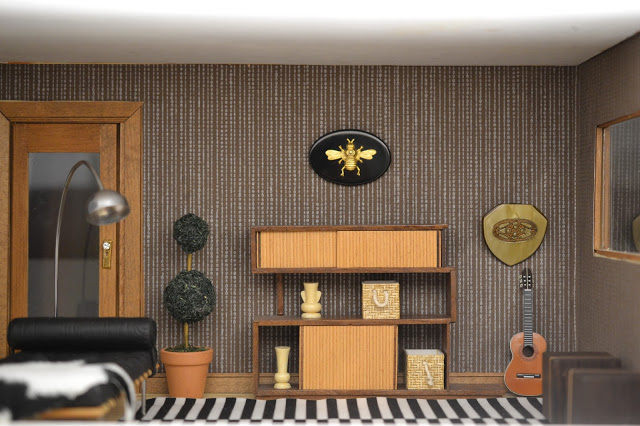
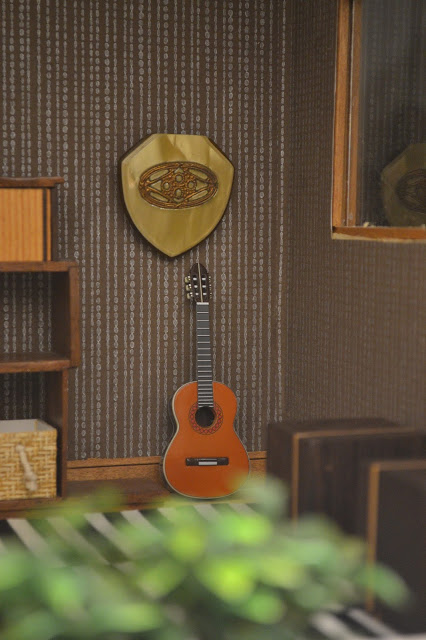
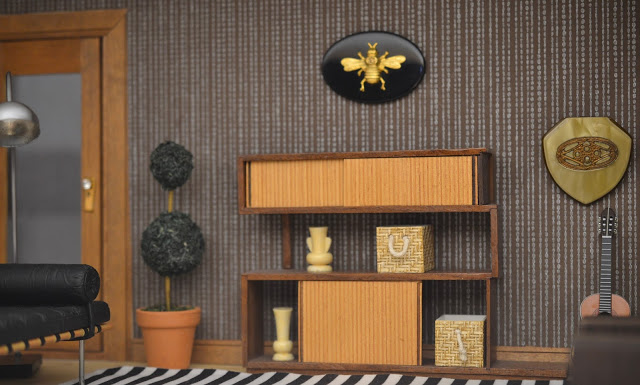
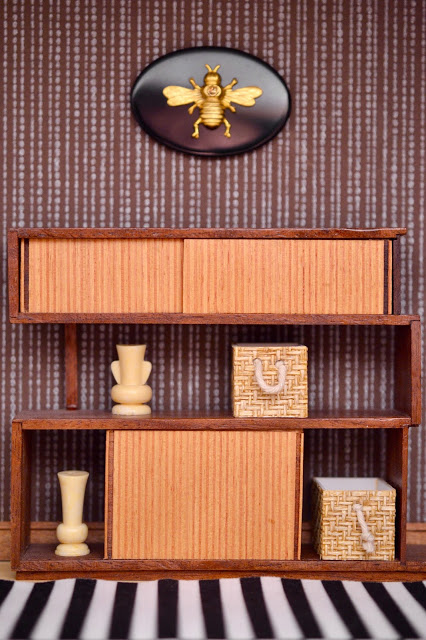
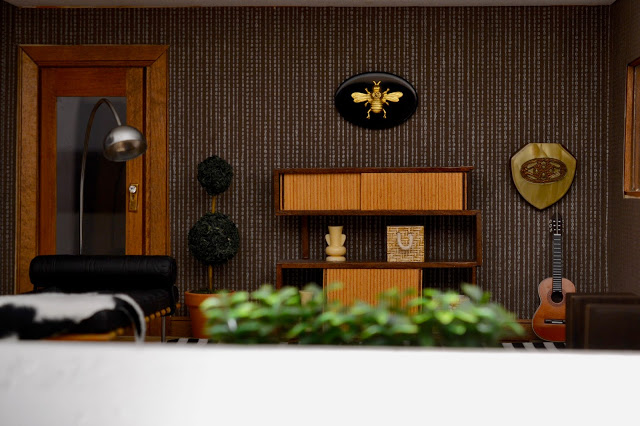
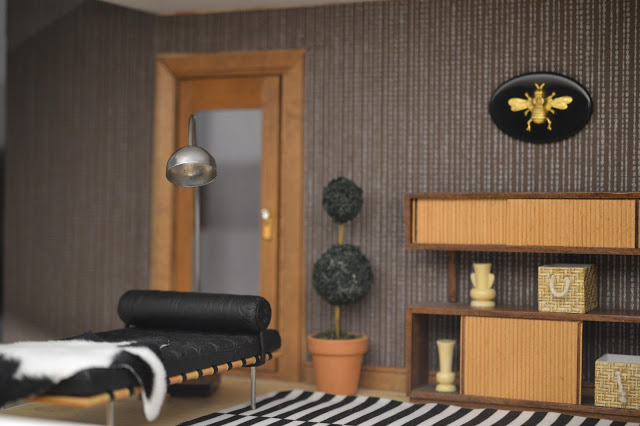
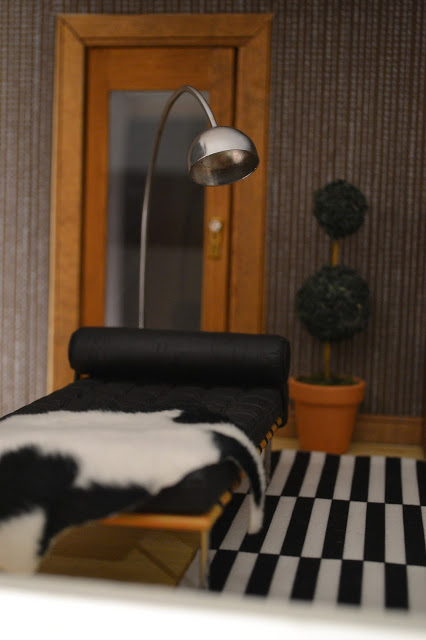
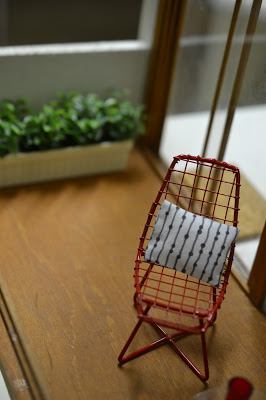
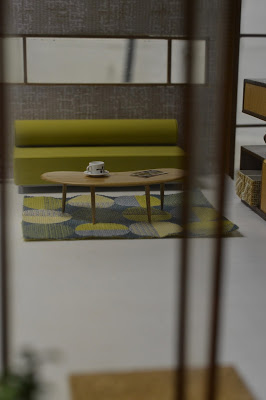
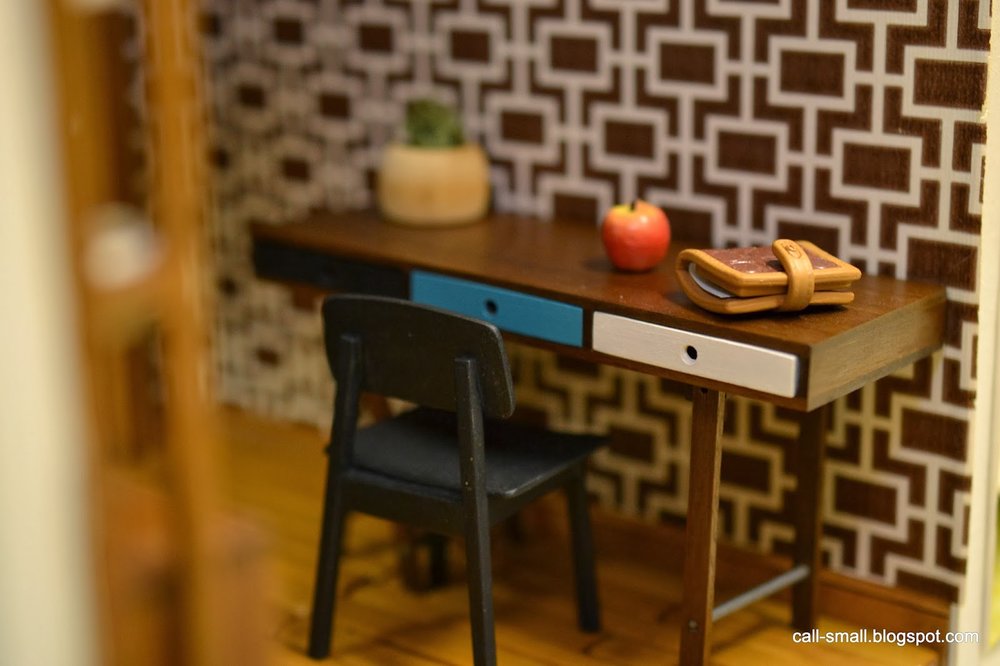
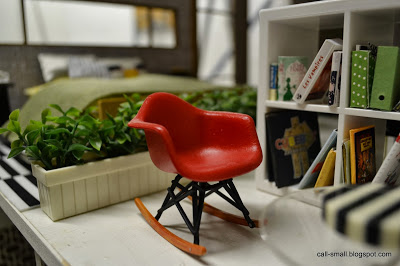
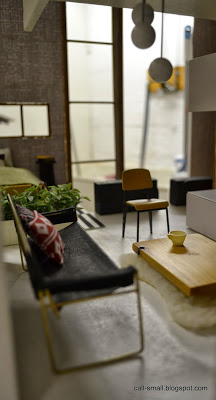
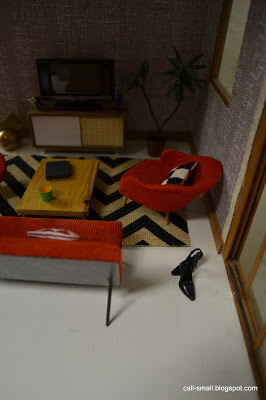
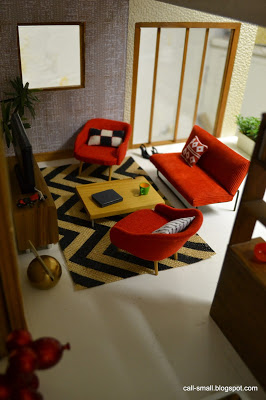
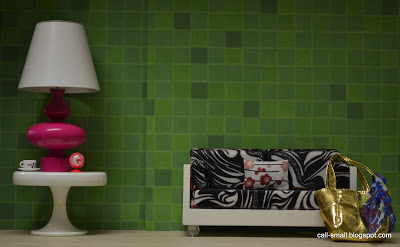
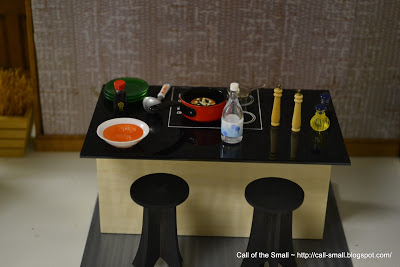
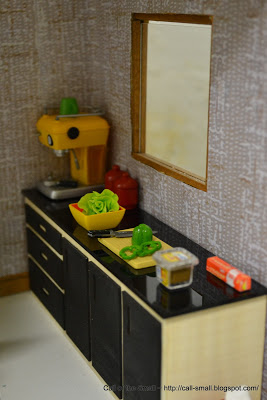
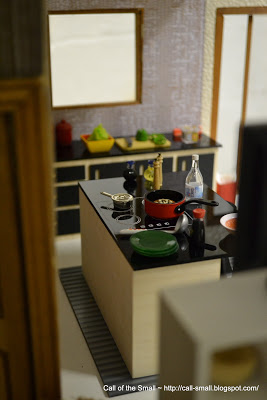
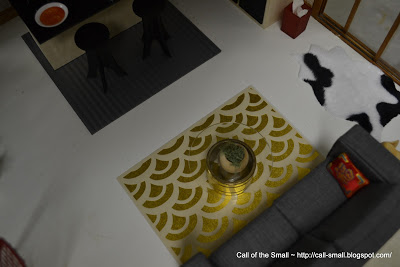
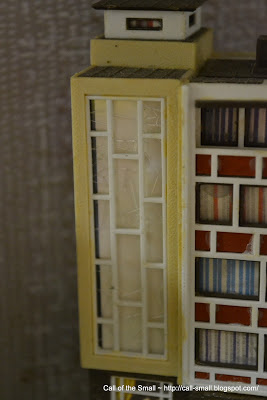
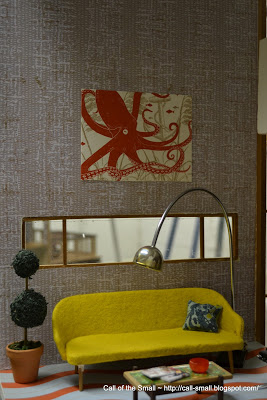
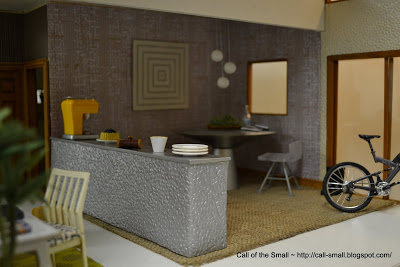
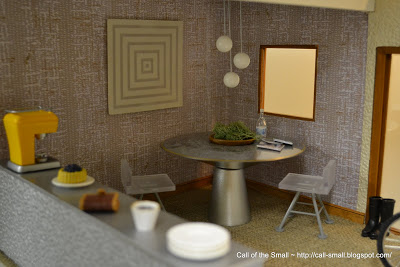
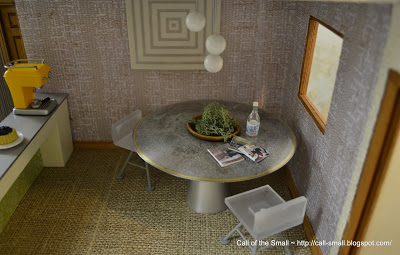
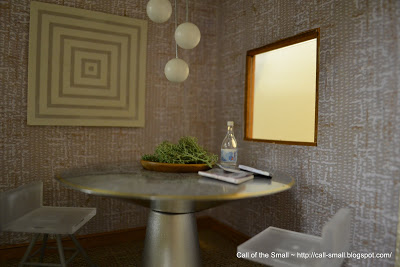
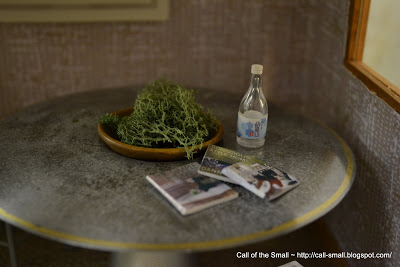
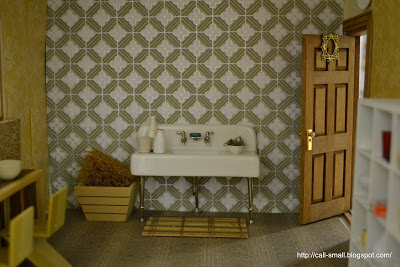
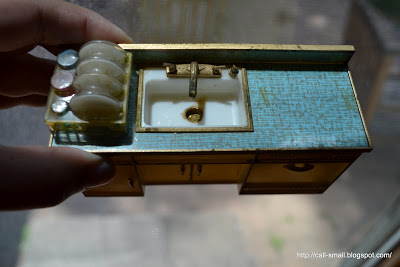
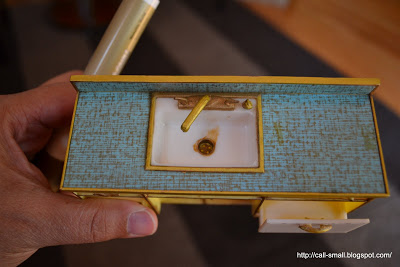
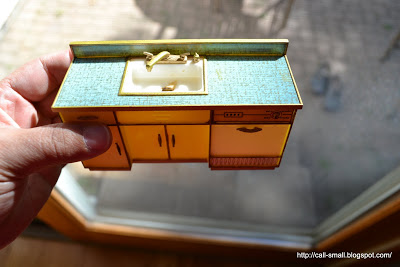
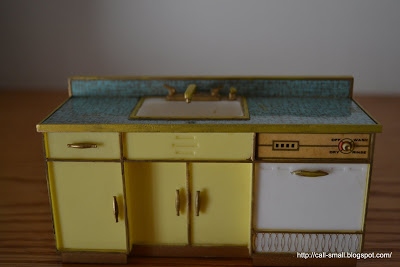
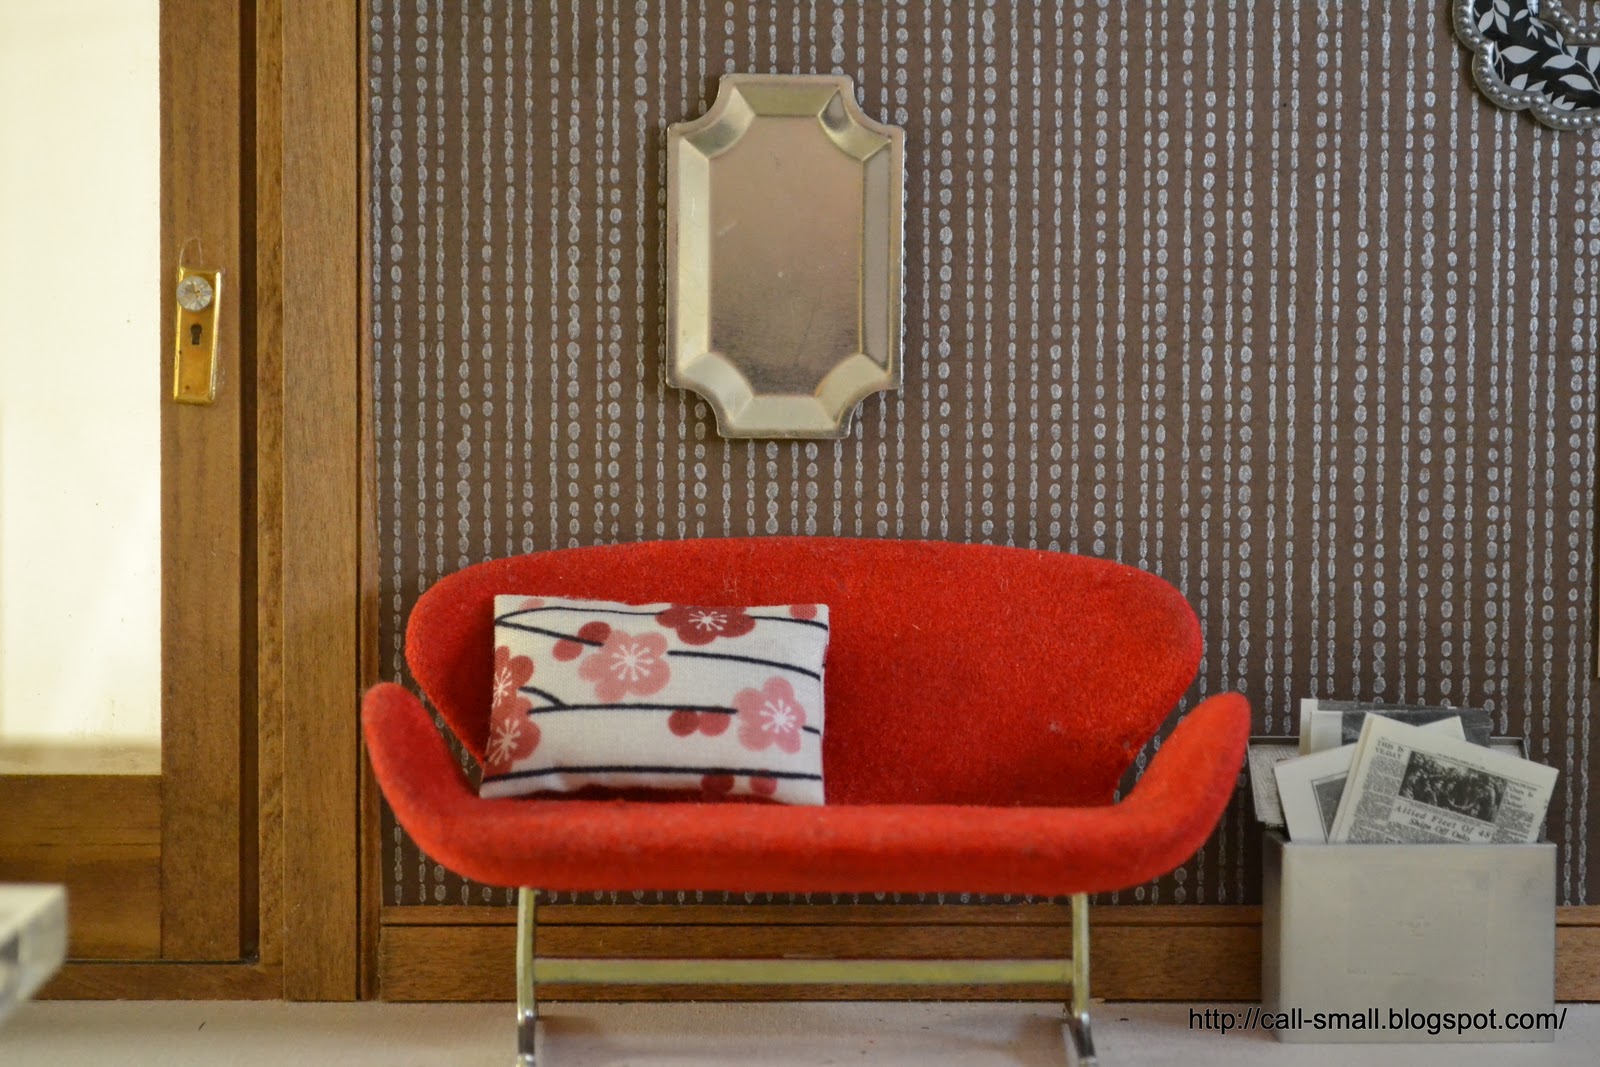
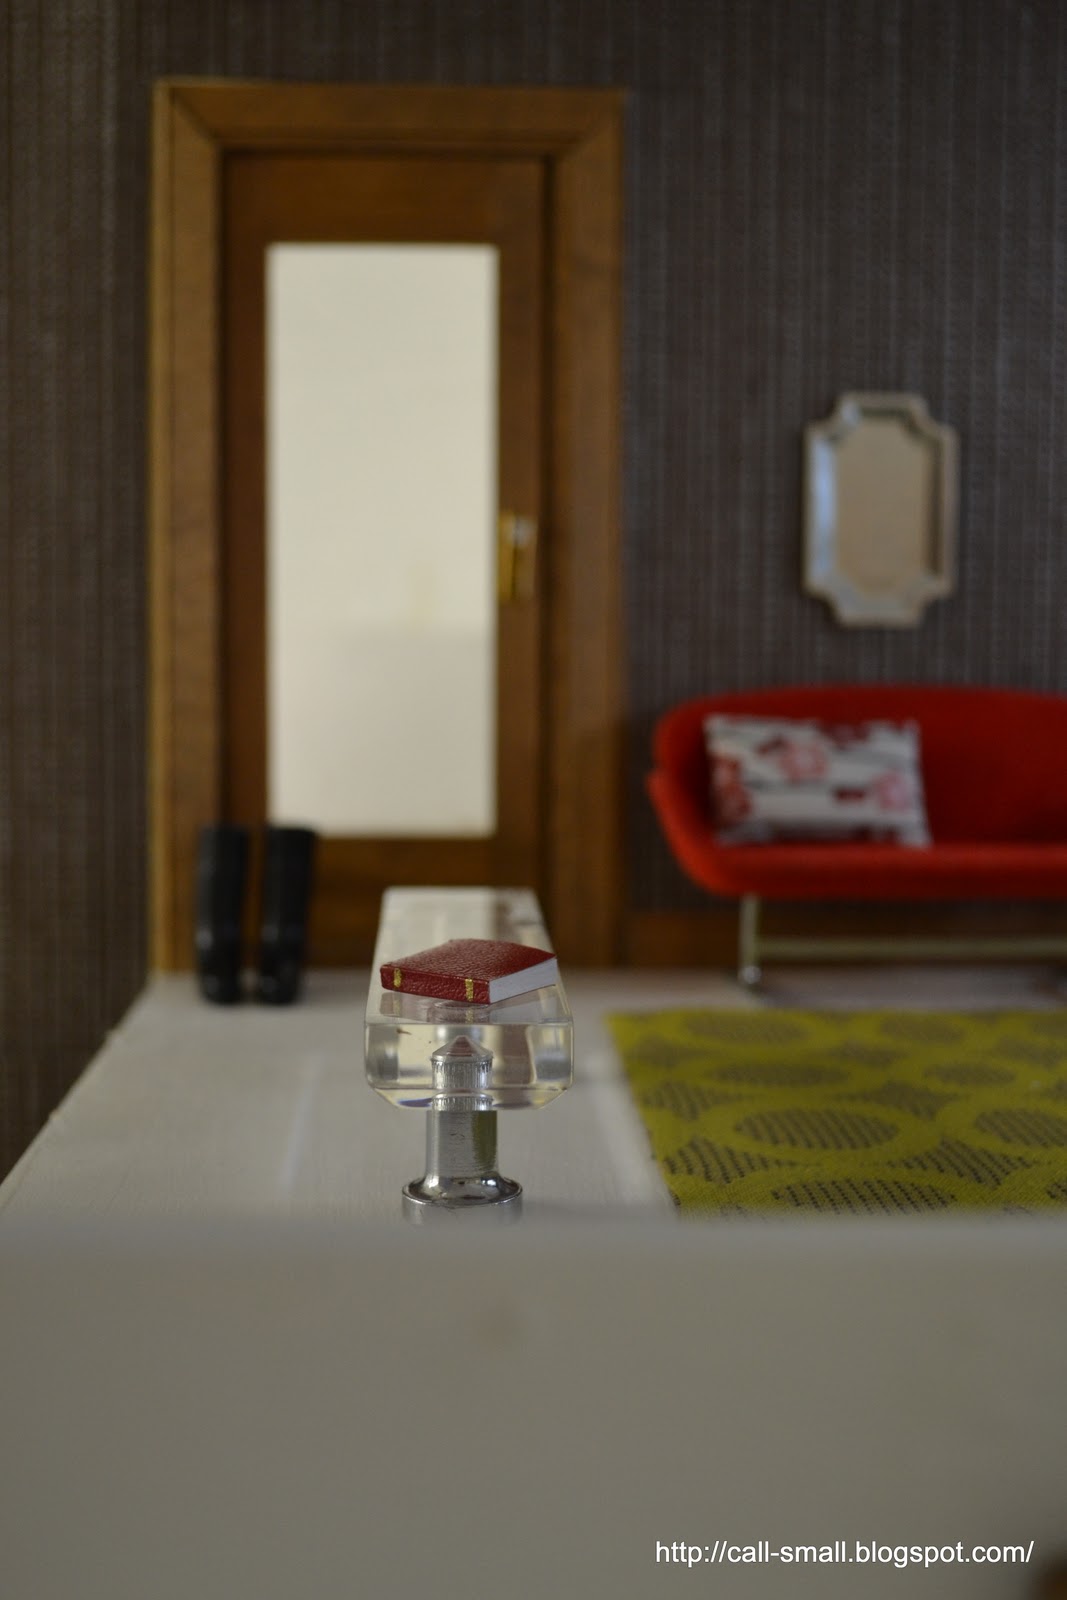
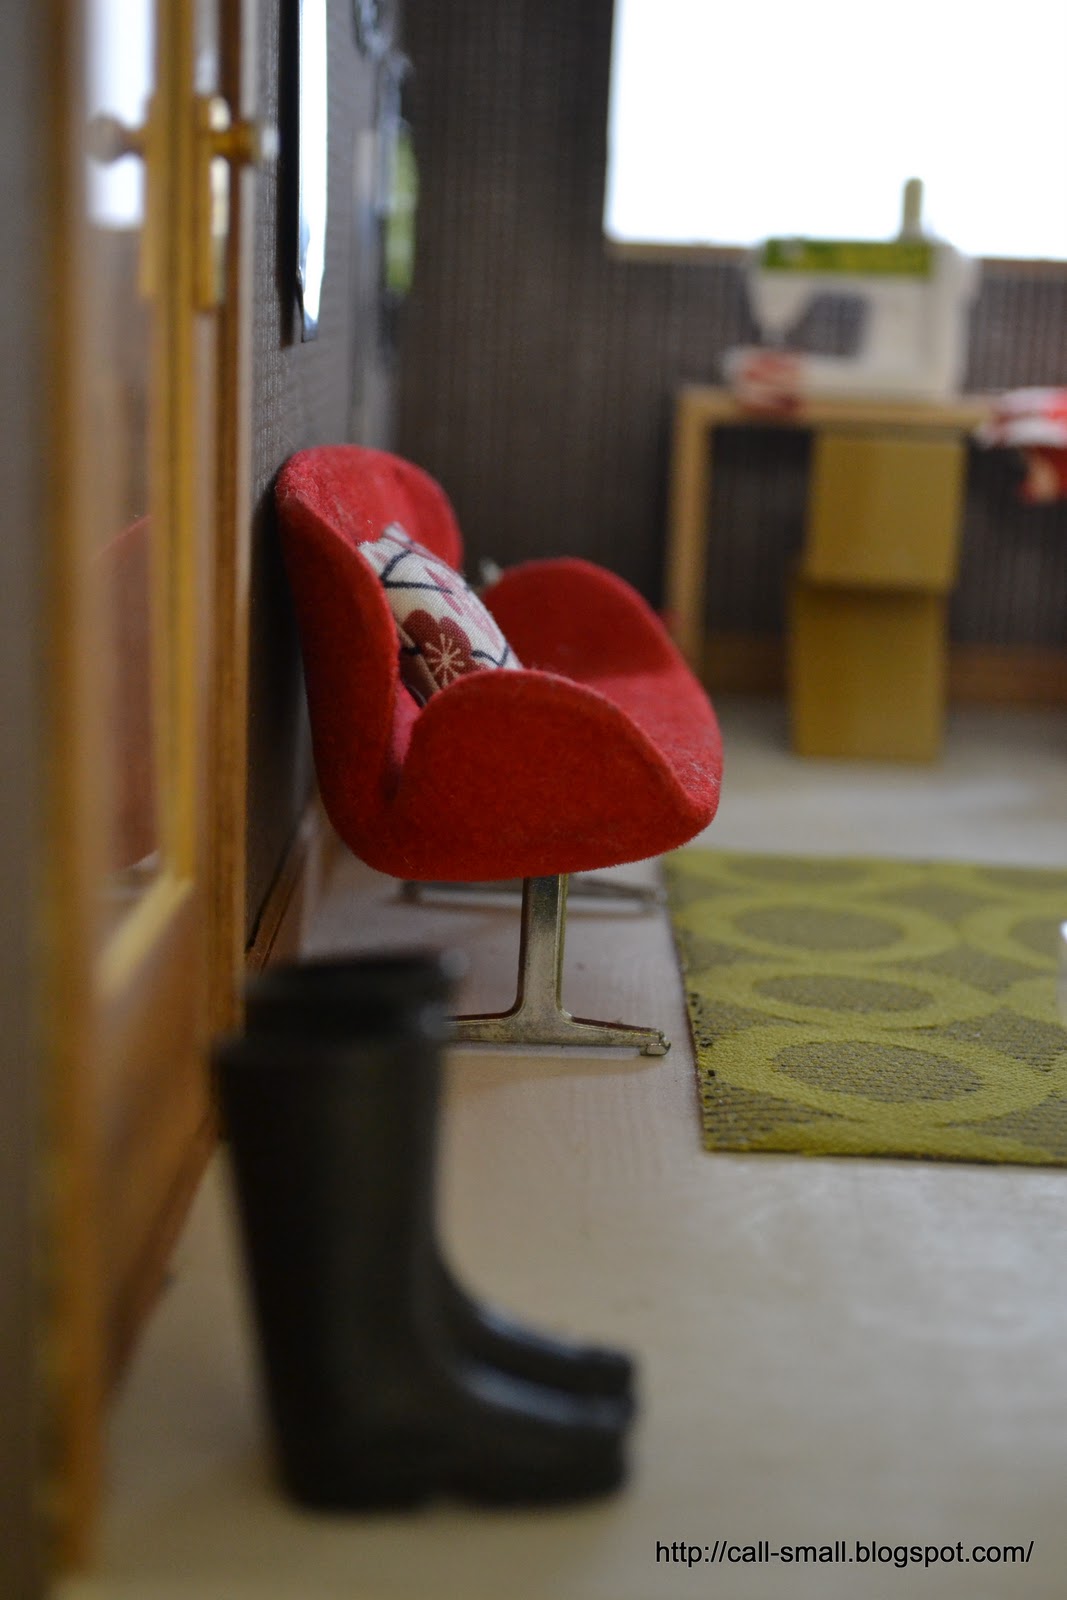
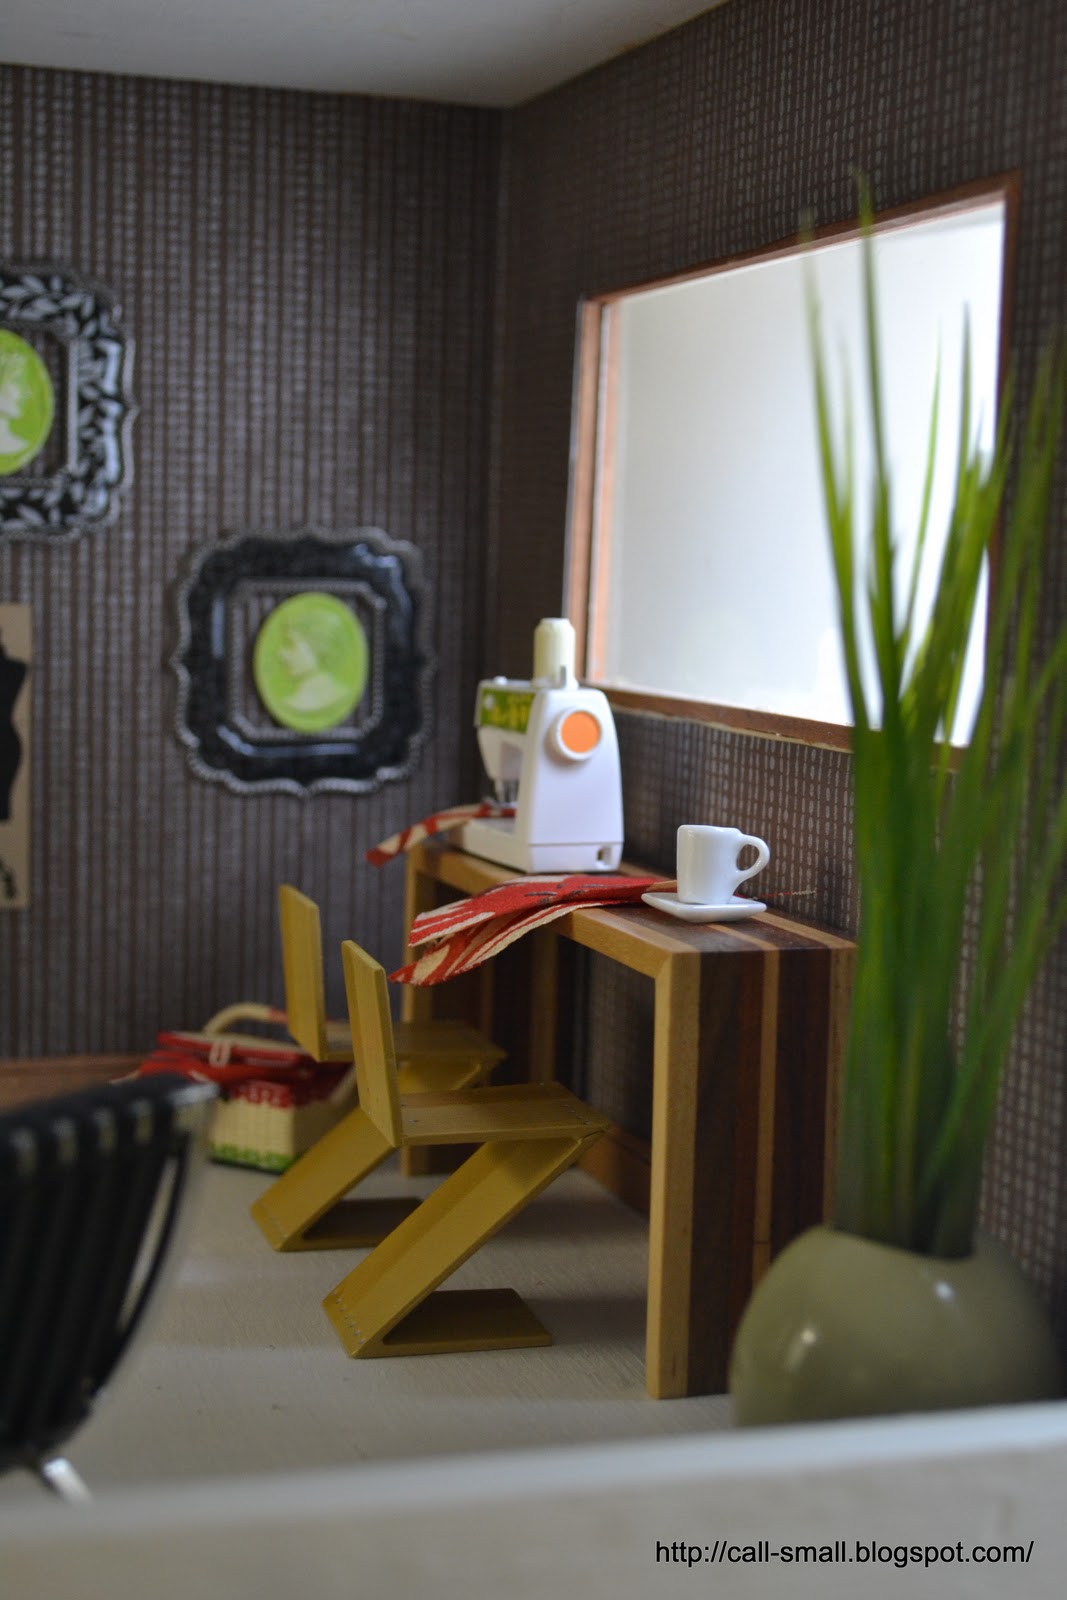
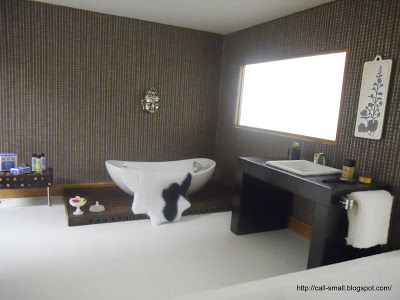
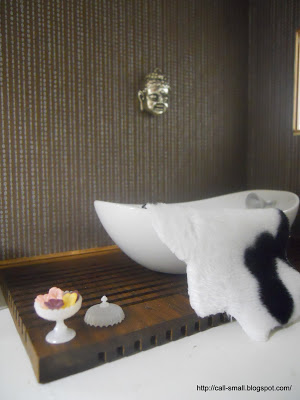
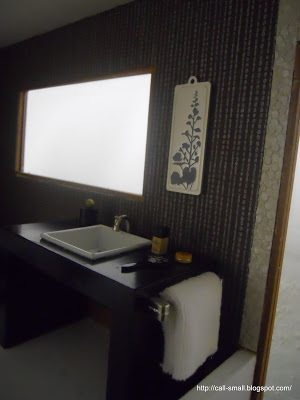
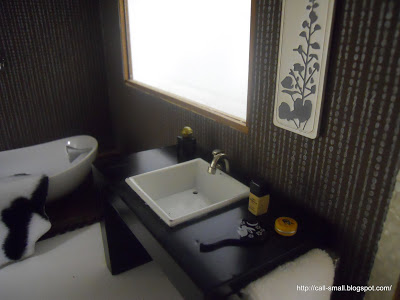
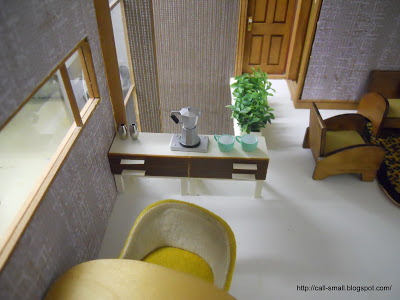
Credits: I wanted to point out the lovely artisan work used in the scenes - thank you all! Desk and Expedit shelving by ELF Miniatures; Blanca TV shelving unit by PRD Miniatures; Long and Low couch, Japanese pillows, Eames Hang-it-All, globe lamp, and green rug in office by minimodernistas; the pink sparkly high heels in the foreground are by Patrizia Santi and were won in one of her giveaways. The Eames chairs are Reac; the table is vintage German; the side tables are from Fridas Fancy. There are countless accessories in the scenes and I know I will not be able to note them all, but the majority are by Re-ment, ELF Miniatures, AG Minis, Manor House Miniatures, Barbie by Jonathan Adler, Barbie, Liv, Nancy Tobey, Peppercorn Minis, Jazams, beads and craft store finds, and Lilu Shop on Etsy.

Aloft


A quick post to share an exciting new purchase: an Arne Jacobsen-designed 1:16 couch made by Brio in the mid-1960s. In addition to being lovely to look at, it is heavy and quite surprisingly substantial for a somewhat small perch. This is one holy grail that I can now happily cross off my list!


While the upper level of my Citadel house is not necessarily the obvious location for this diminutive piece, I think it works. There is some sewing going on here, with a neat Re-ment machine, which I got as a blind box from Toy Tokyo. Lucky! This set is from 2006 and tricky to get; when you can find it, the price tends to be much, much more than the $7.99 I spent...love when that happens.

A reminder to cast your final votes for Call of the Small as Best Miniature Blog in About.com's Readers' Choice Awards! Voting ends on Tuesday, March 8, so cast a vote *daily* until 11:59 p.m. that day! Vote HERE. Thanks so much for your support!


Credits: Couch is by Brio; bench is a drawer pull; Barcelona chair and zigzag chairs are Reac; console is by Paris Renfroe; rug and Japanese pillow is by minimodernistas; sewing machine and basket by Re-ment; plant pot is Manor House Miniatures and plant is an aquarium plant; wall art includes charms and scrapbook paper from Michaels. Accessories are AG Minis, ELF Miniatures, Manor House Miniatures, and thrift store finds.

Re-ment: The retro sewing machine and basket are from Retro Electrical Appliances #7, and are good for 1:12.

Work from Home


If I did work from home, I'd want a space like this. So light and airy, and it looks productive. My husband sometimes telecommutes, and he might wish for this space too; instead, he's in the basement looking at my dollhouses, which lie in view just beyond his computer monitors!

The desk unit is from a lot of vintage German items that I purchased from Oese (thanks, Oese!). I don't believe that this particular piece was meant for work, likely sleep. It appears to be a headboard with built-in side tables for night reading. I could be wrong, but this is what struck me at first glance. It it is very sturdy and well-made, and I love the look of the wood.


I had fun accessorizing here with books, knickknacks, and office items, but it took a bit of time. The plant was quick -- made with a Playmobil pot and a new aquarium plant! I've used the drawer pull before, but this time it is a peaceful perch for a lunch of delicious noodles.


I decided to throw in a picture for scale with what looks like my giant hand. I never do this, and it never occurs to me to do so because I am wrapped up in a much tinier space, but people do sometimes ask me about the scale in this house.


Now if only I could shrink my workload... :)

UPDATE, 12/13/10: Rebecca and other fellow bloggers have kindly identified the desk piece as a headboard unit by Bodo Hennig, so I have updated the credits below accordingly. My desk, which has been in my collection for a while, is also Bodo Hennig. Please see the comments for links to other pictures of this lovely piece. Thanks, all!

Credits: Desk unit and desk are Bodo Hennig; lamp is vintage German; chair is Reac; bench is a drawer pull; plant is a Playmobil pot with an aquarium plant; rug is made by Oese; wastebasket is Re-ment; bead sculpture next to green file folders is by Nancy Tobey. Accessories are Bandai, Re-ment, beads from Pubdoll, AG Minis, Hallmark, Bozart, handmade by me, Barbie by Jonathan Adler, and random dolls house and craft store finds.

Re-ment: I have written about the Re-ment in this scene with one exception. The three files and holder are from Girls in the City #6, "Office Supply 101," and are good for 1:12.

More Complete


I finally got to address the double-height wall in my Citadel, the last to get renovated in that part of the house (the room on the bottom right, formerly the kitchen, still awaits an identity, and there are still rooms on the other side). I received a lot of great feedback in the spring on the wall, and the ideas I kept coming back to related to adding texture.

On my great adventure with Pubdoll, I found some "pebble" paper in a rich creme color at Kate's Paperie. I also bought a few sheets in silver. I decided to go with the creme and then went about setting up the space with the large window and sliding doors in place. Here's a closeup of the paper:


My DIY moment this time around involved the art display on the overhang. This started as a key hook from the clearance bin at Bed, Bath, and Beyond!


The living area shows an arc lamp -- not my favorite one from minimodernistas, which I am attempting to touch up a bit, but a vintage chrome one I bought on eBay recently. It's neat, but I was disappointed to see that the head had some yellowed glue residue. I wonder if it was handmade. Hope it doesn't come across too much in the photos.


I decided to use yet another drawer pull from that thrift store in Chicago. This one is larger.


I flipped a AG Minis couch for a little eating area. I did this once in my Lundby Stockholm for a bar. That Chilewich placemat continues to come in handy. Please try to ignore the utilitarian mess in the background...!


Upstairs is my first attempt at a bath in this space -- searching for some serenity.


I may still change this double-height wallpaper if I find something different, but I think I'll stick with it for now. I intend to move onto my VERO next!

Credits: Arc lamp is an eBay find; couches are Bozart; side table is an artisan-made piece from Frida's Fancy doll house shop; rug is embossed felt from Michaels; coffee table is by Ryan's Room; lucite bench is a drawer pull; moss pots are made by me with craft items from Michaels; table is an AG Minis couch upside down; tulip chairs are Reac; pharmacy light is minimodernistas; art display is a key hook turned upside down with charms from Michaels; bath tub is a dish with a Mighty World funnel as a spout, and bath platform consists of two coasters from Crate and Barrel; bath throw is handmade by Oese; sink is an eBay find; pixel side table is by minimodernistas; clear plastic chairs are from FAO Schwarz; pouf is Lundby. Accessories are charms from Michaels, beads from Pubdoll, Gigi N Studio, Chrysonbon, Barbie by Jonathan Adler, Re-ment, and Tynies.

Re-ment: The bath flowers in the white bowl, four plastic bottles on the ottoman, and Burt's Bees-looking container on the sink are from I Love Hawaii # 7, "Looking for Souvenirs," and are good for 1:12. The black mirror on the sink and the purse on the chair are from Oriental Season, "Spring," and are good for 1:12.

A New View


I had an inkling when I purchased the chair and couch in this scene that I would be able to find out their maker. For some reason, I just felt I had seen them before. Well, I happily discovered mention of them in two of my Dian Zillner books that they are by Hall's Lifetime Toys, and were likely made in the mid-1960s as part of a few different lines of 1:12 furniture (Hall's also made larger, 1:6 scale furniture for Ginny and comparable dolls).

The Zillner books -- International Dollhouses and Accessories, 1880s to 1980s and Antique and Collectible Dollhouses and Their Furnishings -- are slightly confusing on the line, however, since in one (International) it states that these pieces were part of a finer "Cherry" line, and in the other book it states that the set was a cheaper boxed line of simple/economical furniture, which also included a coffee table and television set. By the way, the current value put on a boxed set is $50-$75, making my two un-boxed pieces a pretty decent buy at $8.50. I think the pieces are very well-made; the fabric is like a raw silk and the wood very smooth and fine. I have a hard time believing these pieces were part of an economy line.


I am glad I was able to I.D. them, though!

I entitled this post "A New View" primarily because I recently experienced a view into a dollhouse collector's world in the book Dollhouse Living by Beauregard Houston-Montgomery, published in 2000. Have you seen this book?


It features very dramatic, moody, and powerful photographs by and of Houston-Montgomery's super extensive dolls house collection. The photos are accompanied by personal text about some of his life events, primarily about growing up gay and finding joy and comfort in dolls houses in his young and adult years. A short film about Houston-Montgomery premiered in June -- you can see a (very short) trailer here.

I love seeing glimpses in his Marx, Rich, and TOMY homes, just to name a few.


And I saved the best "new view" for last! I met the wonderful Norway-based Pubdoll this weekend in New York City! It was a great treat. After exchanging some goodies (more to come on that), we went to the Japanese bookstore Kinokuniya, where we scored some Re-ment and stationery treasures, and then bussed it up to FAO Schwarz to the dollhouse store there, where Pubdoll purchased some lovely furniture and accessories. Even Polly had a peek into the Emerson on display, with a tall dark handsome stranger by her side...she tried out a Reac zigzag chair, too!


(By the way, definitely buy your Emerson online -- FAO's store prices were $100 above their website.)

After a yummy lunch at Le Pain Quotidien, we had a nice stroll around Kate's Paperie and left with some amazing papers and other related goods. We did a lot of walking and talking, took in the city sights, and I am so glad I got to meet this lovely gal. I only wish she lived closer! We talked about the idea floating around about a modern miniature meet-up, and hope that happens in one form or another.

Here's a final, funky, imperfect view of two:


Credits: Chair and couch are by Hall's Lifetime Toys; boomerang table and side tables are vintage German; lucite table is a drawer pull; hanging light is vintage Lundby; plant is vintage TOMY; rug is AG Minis. Accessories are Re-ment, Mighty World, beads from Pubdoll, and dollhouse store finds.